Graphics Programs Reference
In-Depth Information
2.
Click the red axis on the Move gizmo, as shown in Figure 22.41. The axis turns yellow to
indicate that it is active and you see a red vector appear. If you don't see the gizmo, make
sure you are in the Realistic visual style.
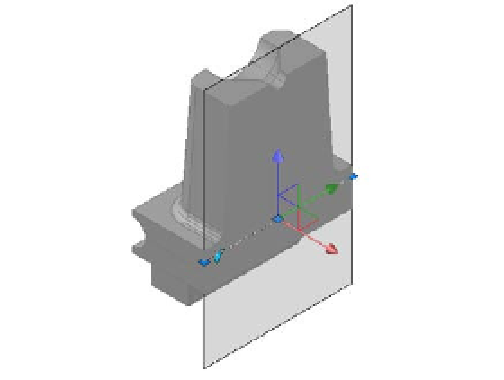
FIGURE 22.41
Moving the surface
plane across the
bracket
Click and drag
this axis of the
Move gizmo.
3.
Move the cursor slowly toward the back of the bracket.
4.
When the section plane is roughly in the middle of the tapered portion of the bracket,
click the mouse to fix the plane in place. You should have a view similar to Figure 22.42.
FIGURE 22.42
The surface plane
fixed at a location
Now you see only a portion of the bracket behind the section plane plus the cross section of
the plane, as shown in Figure 22.43. You can have the section plane display the front portion as a
ghosted image by doing the following:
1.
With the section plane selected (you should still see its Move gizmo), right-click and
choose Live Section Settings. In the Section Settings dialog box, under the Cut-Away
Geometry category, click Show. Click OK. The front portion of the bracket appears in red
(Figure 22.43).
2.
Press the Esc key to remove the section plane from the current selection. The cut-away
geometry remains in view.