Graphics Programs Reference
In-Depth Information
Revolving a Polyline
When your goal is to draw a circular object, you can use the Revolve tool in the Tool Sets pal-
ette to create a solid that is
revolved
, or swept in a circular path. Think of Revolve's action as
similar to a lathe that lets you carve a shape from an object on a spinning shaft. In this case,
the object is a polyline, and rather than carve it, you defi ne the profi le and then revolve the
profi le around an axis.
In the following exercise, you'll draw a solid that will form a slot in the tapered solid. A 2D
polyline that is the profi le of the slot has been created for you. You'll simply use cut and paste to
bring the polyline into the bracket drawing:
1.
Select 2D Wireframe from the Visual Styles menu on the Viewport Controls.
2.
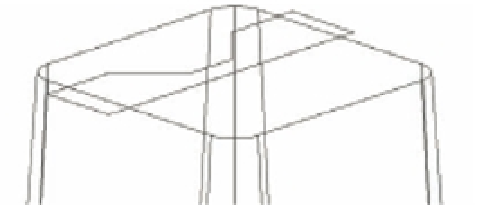
Zoom in to the top of the tapered box so you have a view similar to Figure 22.12.
FIGURE 22.12
An enlarged view
of the top of the
tapered box and
pasted polyline
Axis end point
Axis start point
3.
Turn on the Revolve layer. This layer contains a closed polyline that you'll use to create a
cylindrical shape.
4.
Click the Revolve tool on the Tool Sets palette, or type
REV
↵ at the Command prompt.
5.
At the Select objects to revolve or [MOde]: prompt, pick the polyline on the top of
the tapered surface and press ↵.
6.
When you see the prompt
Specify axis start point or define axis by [Object/X/Y/Z] <Object>:
use the Endpoint osnap override and pick the beginning corner endpoint of the polyline
you just added, as shown in Figure 22.12.
7.
At the Specify axis endpoint: prompt, pick the axis endpoint indicated in
Figure 22.12.
8.
At the Specify angle of revolution or [STart angle/Reverse/eXpression] <360>:
prompt, press ↵ to sweep the polyline a full 360°. The revolved form appears, as shown in
Figure 22.13.