Graphics Programs Reference
In-Depth Information
EXERCISE EXAMPLES ARE “UNITLESS”
To simplify the exercises in this chapter, the instructions don't specify inches or centimeters. This
way, users of both the metric and Imperial measurement systems can use the exercises without
having to read through duplicate information.
Creating Solid Forms
In the following sections, you'll begin to draw the object shown later in the chapter in
Figure 22.18. In the process, you'll explore the creation of solid models by creating primitives
and then setting up special relationships between them.
Primitives are the basic building blocks of solid modeling. At fi rst, it may seem limiting to
have only eight primitives to work with, but consider the varied forms you can create with just a
few two-dimensional objects. Let's begin by creating the basic mass of your steel bracket.
First, prepare your drawing for the exercise:
1.
Open the fi le called Bracket.dwg. This file contains some objects that you'll use in the
first half of this chapter to build a 3D solid shape.
2.
Make sure the Tool Sets palette shows the Modeling tool set.
3.
Close the Material Browser if it is open.
Joining Primitives
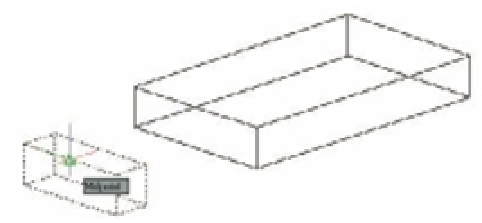
In this section, you'll merge the two box objects. First, you'll move the new box into place. Then
you'll join the two boxes to form a single solid:
1.
Click the Move tool, pick the smaller of the two boxes, and then press ↵.
2.
Use the Midpoint osnap, and pick the middle of the front edge of the smaller box, as
shown in the top image in Figure 22.4.
3.
Use the Midpoint osnap to pick the middle of the bottom edge of the larger box, as shown
in the bottom image in Figure 22.4.
4.
Click the Union tool in the upper part of the Tool Sets palette, or type
UNI
↵.
FIGURE 22.4
Moving the
smaller box