Graphics Programs Reference
In-Depth Information
Editing Lights
You've added the point light. Before you see the results in a rendering, you'll also change the
spread of the spotlights. In this exercise, you'll edit the properties of the spotlight. Not all lights
have the same properties, but the basic process for editing all lights is the same:
1.
A-click the two spotlights to select them.
2.
Click Essentials in the Properties Inspector palette. You'll see that there are a number of set-
tings available, including Intensity Factor. You can adjust these settings to control the lights
(Figure 21.24).
FIGURE 21.24
Light adjustment
options in the
Properties Inspec-
tor palette
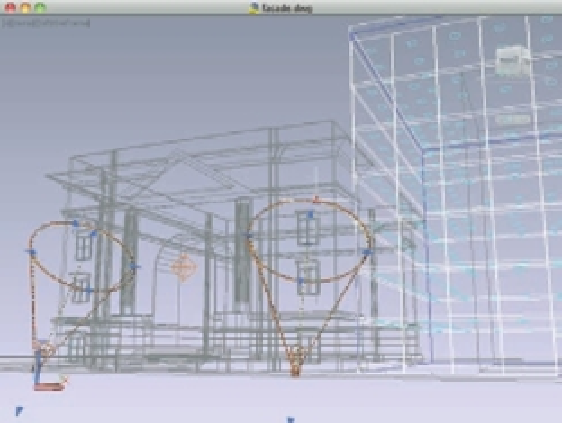
Notice that there is one red and one yellow light cone for each spotlight. The cones also have
an arrowhead at each of four locations around the widest part of the cone. These are the hotspot
and falloff cones. They help you visualize the size of the hotspot and falloff of the light from
each spotlight. Next, adjust the falloff of both spotlights to soften their effect on the view:
1.
Click the arrowhead at the spotlight cone to the right (Figure 21.25). A text box appears
that refl ects the angle of the falloff for the spotlight.
2.
Type
90
↵. The cone changes shape to become wider.
3.
Repeat steps 1 and 2 for the spotlight to the left.
FIGURE 21.25
Click the arrowhead
on the spotlight cone
shown here.
Click this
arrowhead.