Graphics Programs Reference
In-Depth Information
You'll use this file as a starting point for the legs, and then you'll import the legs into the
barcelona1.dwg file:
1.
Open the legs.dwg file. Metric users should open the legs_metric.dwg file. The file
consists of two polyline splines that are in the shape of one set of legs. You'll turn these
simple lines into 3D solids.
2.
Choose Modify
Object
Polyline from the menu bar or type
PE
↵.
3.
At the Select polyline or [Multiple]: prompt, enter
M
↵ to select multiple polylines.
Then select the two polylines, and press ↵.
4.
At the Enter an option [Close/Open/Join/Width/Fit/Spline/Decurve/Ltype gen/
Reverse/Undo]: prompt, enter
W
↵.
5.
At the Specify new width for all segments: prompt, enter
0.5
↵ to give the polylines
a width of 0.5˝. Metric users should enter
1.27
↵.
6.
Press ↵ to exit the Pedit command.
Next, you need to change the Thickness property of the two polylines to make them 2˝ or 5
cm wide. You'll use the Chprop command to do this:
1.
With the two polylines selected, enter
CHPROP
↵.
2.
Enter
T
↵ for the Thickness option and enter
2
↵↵ to set their thickness to 2. Metric users
should set their thickness to 5 cm.
3.
Choose Modify
3D Operations
Convert to Solid on the menu bar or enter
CONVTOSOLID
↵ at the Command prompt.
4.
Select the two polylines, and then press ↵. The lines become 3D solids.
5.
Click the Union tool in the upper part of the Tool Sets palette. You can also type
UNION
↵.
6.
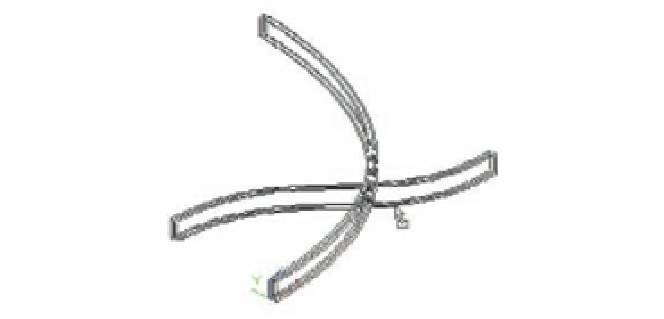
Select the two legs, and press ↵. The two legs are now a single 3D solid, as shown in
Figure 20.9.
FIGURE 20.9
The polylines con-
verted to 3D solids