Graphics Programs Reference
In-Depth Information
3.
Right-click the mouse to open the Grip Edit shortcut menu.
4.
Choose Rotate from the menu. The seat back now rotates with the movement of the cur-
sor. It rotates in the plane of the new UCS you created earlier.
5.
Type
80
↵ to rotate the seat back 80°. Your view looks like the second image in Figure 20.7.
6.
Click the bottom grip, as shown in the second image in Figure 20.7.
7.
Right-click the mouse again and choose Move.
8.
Using the Endpoint osnap, click the top corner of the chair seat to join the chair back to
the seat, as shown in the second image in Figure 20.7.
9.
Click the chair seat to add it to the selection; then click the bottom-corner grip of the seat,
as shown in the third image in Figure 20.7.
10.
Right-click and choose Rotate from the Grip Edit shortcut menu.
11.
Enter
-10
↵ to rotate both the seat and back minus 10°. Press the Esc key to clear the grips.
Your chair looks like Figure 20.8.
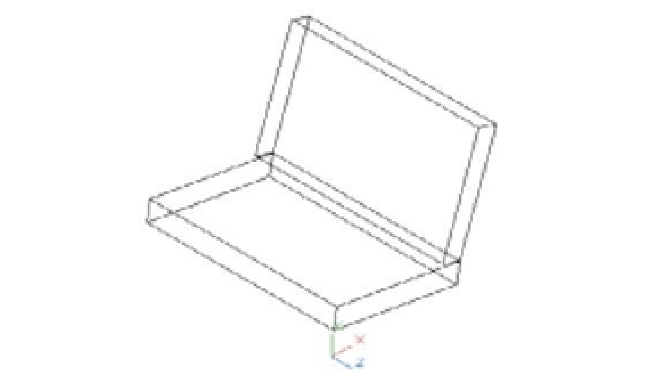
FIGURE 20.8
The chair after
rotating and
moving the
components
The new UCS orientation enabled you to use the grips to adjust the chair seat and back. All
the grip rotation in the previous exercise was confined to the plane of the new UCS. Mirroring
and scaling will also occur in relation to the current UCS.
Building 3D Parts in Separate Files
As you work in 3D, your models will become fairly complex. When your model becomes too
crowded for you to see things clearly, it helps to build parts of the model and then import them
instead of building everything in one file. In the next set of exercises, you'll draw the legs of the
chair and then import them to the main chair file to give you some practice in the procedure.
I've prepared a drawing called legs.dwg, which consists of two polylines that describe the
shape of the legs. I did this to save you some tedious work that isn't related to 3D modeling.