Graphics Programs Reference
In-Depth Information
Marking Divisions on Curves
Perhaps one of the most difficult things to do in manual drafting is to mark regular intervals on
a curve. AutoCAD offers the Divide and Measure commands to help you perform this task with
speed and accuracy.
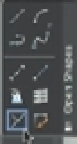
You can find the Divide and Measure tools on the expanded Open Shapes panel of the Tool
Sets palette, as shown in Figure 17.23. Click the arrow of the Open Shapes panel, and then click
and hold the Multiple Points drop-down to display the pop-up menu.
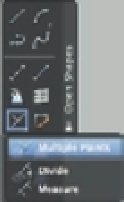
FIGURE 17.23
The Divide and
Measure tools are
in the expanded
Open Shapes panel
on the Tool Sets
palette and appear
on a drop-down.
Click the
Open Shapes
disclosure
triangle in
the Tool Sets
panel.
Click and
drag the
Point tool.
The Divide
and Measure
tools appear
in the flyout.
The Divide and Measure commands are discussed here in conjunction with polylines, but
you can use these commands on any object except blocks and text.
Dividing Objects into Segments of Equal Length
Use the Divide command to divide an object into a specific number of equal segments. For
example, suppose you need to mark off the contour you've been working on in this chapter
into nine equal segments. One way to do this is to first find the length of the contour by using
the List command and then sit down with a pencil and paper to figure out the exact distances
between the marks. But there is another, easier way.
The Divide command places a set of point objects on a line, an arc, a circle, or a polyline,
marking off exact divisions. The following exercise shows how it works:
1.
Open the 17a-divd.dwg file. This file is similar to the one you've been working with in
the previous exercises.
2.
Click and hold the Multiple Points drop-down in the expanded Open Shapes panel of the
Tool Sets palette and select Divide (Figure 17.23). You can also choose Draw
Point
Divide or type
DIV
↵.