Graphics Programs Reference
In-Depth Information
Within the drawing area, you see three items. The UCS icon appears in the lower-left corner.
You'll learn more about the UCS icon in a moment (see the section “Understanding the UCS
Icon”). In the upper-right corner, you see the ViewCube. The ViewCube is primarily for 3D mod-
eling, and you'll learn more about it in Chapter 19, “Creating 3D Drawings.” In the upper-left
corner you see the viewport controls. In Figure 1.7 they show a plus sign and the words Top,
and 2D Wireframe. The plus sign offers viewport options that you'll learn about in Chapter
20, “Using Advanced 3D Features.” The other two options change depending on the way your
drawing is displayed. You'll get a closer look at these options a bit later in this chapter. For now,
let's continue examining the parts of the AutoCAD screen.
WHY DOES THE DRAWING AREA LOOK DIFFERENT ON MY SCREEN?
You probably noticed that the drawing area shown in this topic has a white background while the
drawing area in your version of AutoCAD shows a dark gray background. I'm using a white back-
ground in the topic to make things easier to see on a printed page. White lines on a dark back-
ground do not print very well. You can also change your drawing area background to white using the
AutoCAD Application Preferences. See Appendix B on the topic's website for more on the AutoCAD
Application Preferences.
T
H E
C
O M M A N D
L
I N E
P
A L E T T E
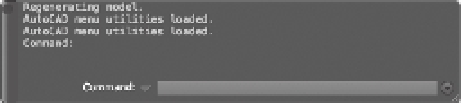
The Command Line palette (Figure 1.8), located just below the drawing area, gives you feedback
about AutoCAD's commands as you use them. You can move and resize this palette just as you
move and resize other palettes and windows on the Mac. For example, you can click the disclo-
sure triangle (more commonly called the disclosure triangle, which is the term I'll use through-
out this topic) on the right side to expand and contract the palette.
FIGURE 1.8
The expanded
Command Line
palette
Disclosure triangle
T
H E
S
T A T U S
B
A R
To the right of the Command Line palette is the status bar (Figure 1.9). The tools in the status
bar offer aids to the drafting process. You'll fi nd tools to turn on the grid and snap functions as
well as tools to help you control the scale of text and symbols.
FIGURE 1.9
The status bar