Graphics Programs Reference
In-Depth Information
You may also notice the Insert Column Left, Insert Column Right, and Delete Column options
in the Table Cell visor. These tools let you add or delete columns. These options function in a way
that's similar to how the Delete Row and Insert Row options function.
Editing the Table Line Work
So far, you've concentrated on how you can format text and cells in a table, but you'll also want
some control over the lines in the table. Typically, heavier lines are used around the border of
the table and between the title and the rest of the table.
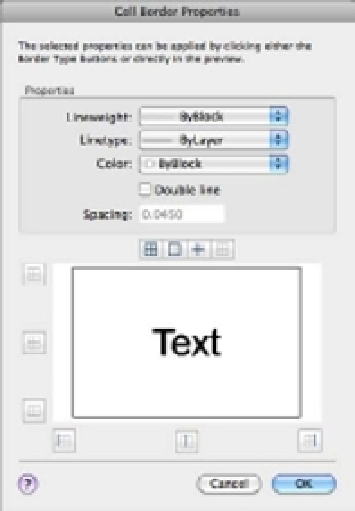
The Border Style option lets you modify the outline of the border. When you select this
option, the Cell Border Properties dialog box opens (Figure 10.13).
You can use this dialog box to fine-tune the appearance of the line work of the table. Try the
following exercise to see firsthand how this dialog box works:
1.
Turn on the display of line weights by clicking on the Show/Hide Lineweights tool on the
Status Bar palette.
2.
Click in the title cell at the top of the table to select the cell, and then in the Properties
Inspector palette, choose Border Style in the Cell category to open the Cell Border
Properties dialog box shown on Figure 10.13.
FIGURE 10.13
Setting border
properties
3.
Click the Lineweight pop-up list, and select 0.30 mm.
4.
Click the Outside Borders button that appears just above the preview to change the bor-
ders of the cell to the selected line weight (Figure 10.14).
5.
Click OK. The title cell is now outlined in a heavier line. To see it clearly, press the Esc key.