Graphics Programs Reference
In-Depth Information
3.
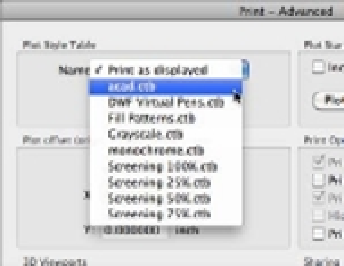
From the Page Setup - Advanced dialog, click the pop-up menu next to Name in the Plot
Style Table group (see Figure 8.16).
FIGURE 8.16
The Plot Style
Table pop-up menu
4.
Select Grayscale.ctb. The Question dialog box appears asking if you wish to use assign
the plot style to all layouts. Clicking No will assign it for the current layout. Clicking Yes
will make the assignment for all layouts in the drawing. Click Yes.
5.
Click the Print With Plot Styles check box. This will print the drawing with the associated
plot style applied.
6.
Click the Display Plot Styles check box. This will allow you to see what your printed out-
put will look like without clicking the Preview button.
7.
Click OK to close the Page Setup - Advanced dialog box. Then click OK to close the Page
Setup - Layout1 dialog box. And finally, click Close to close the Page Setup Manager.
Now let's see how plot styles affect your drawing. You're going to change the wall so that
it appears and plots thicker by changing the Line Width property of the Color 3 (green) plot
style. Remember that green is the color assigned to the Wall layer of your Plan drawing.
Follow these steps:
1.
In the Layers palette, click the Wall layer.
2.
Now, in the Properties Inspector palette, click the Lineweight drop-down list and select
0.50 mm. You may have to scroll down the list to find 0.5000 mm.
3.
Zoom in to the plan to enlarge the view of a unit bathroom and entrance.