Graphics Programs Reference
In-Depth Information
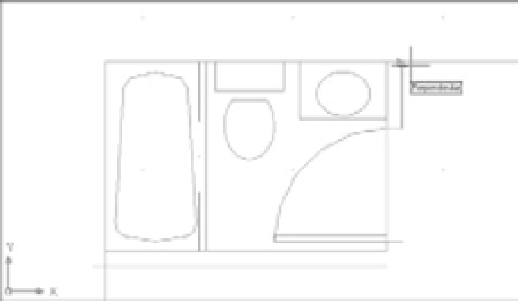
FIGURE 6.15
The first wall line
and the wall line by
the door
Draw the line
to the left past
the vertical wall line.
End the line using the
Perpendicular Osnap.
Add a wall line
from the
endpoint of
the jamb.
10.
Draw a line connecting the two door jambs. Then assign that line to the Ceiling layer.
(See the top panel in Figure 6.16.)
11.
Draw a line 6˝ downward from the endpoint of the door jamb nearest the corner. Assign
that line to the Wall layer. (See the top panel in Figure 6.16.)
In the previous exercise, Osnap Tracking mode enabled you to specify a starting point of a
line at an exact distance from the corner of the bathroom. In step 7, you used the Direct Distance
method for specifying distance and direction.
SELECTING POINTS FROM A KNOWN LOCATION
Instead of using a tracking vector in step 6 of the previous exercise, you can choose From on the
Osnap shortcut menu and then open the shortcut menu again and select Endpoint. Select the corner
and enter a polar coordinate such as
@5<-90
to accomplish the same task as this exercise.