Graphics Programs Reference
In-Depth Information
shortcut menu and select Midpoint; then move the cursor toward the bottom line.
(Remember, A-two finger tap opens the Snap Overrides menu on a trackpad.) When
you see the Midpoint Osnap marker on the line, left-click.
3.
At the Specify other endpoint of axis: prompt, point the cursor downward and
enter
1´-10 ˝
↵. Metric users should enter
55
↵.
4.
At the Specify distance to other axis or [Rotation]: prompt, point the cursor
horizontally from the center of the ellipse and enter
8˝
↵. Metric users should enter
20
↵.
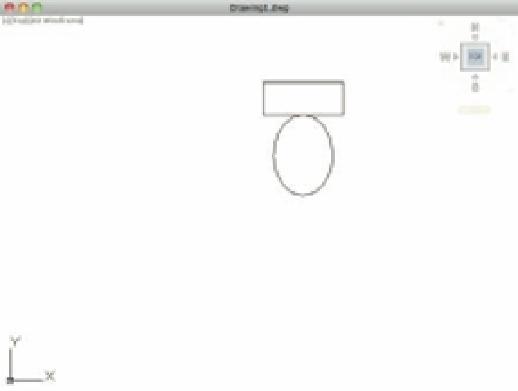
Your drawing should look like Figure 3.4.
FIGURE 3.4
The ellipse added
to the tank
First axis endpoint
Other axis
endpoint
Second axis endpoint
Getting a Closer Look
During the drawing process, you'll often want to enlarge areas of a drawing to edit its objects.
In Chapter 1, you saw how to use the Zoom capability for this purpose. Follow these steps to
enlarge the view of the toilet:
1.
Choose View
Zoom
Window from the menu bar, or type
Z
↵
W
↵.
2.
At the Specify first corner: prompt, pick a point below and to the left of your drawing,
at or near coordinate 5´-0˝,3´-6˝. Metric users should use the coordinate 150.0000,102.0000.
3.
At the Specify opposite corner: prompt, pick a point above and to the right of the
drawing, at or near coordinate 8´-3˝,6´-8˝ (246.0000,195.0000 for metric users). The toilet
should be completely enclosed by the zoom window. You can also use the Zoom tool
in conjunction with the Pan tool on the status bar. The toilet enlarges to fill more of the
screen. Your view should look similar to Figure 3.5 in the following section.