Graphics Programs Reference
In-Depth Information
3.
Press
CTRL
-
SHIFT
-
C
to make an enlarged copy of the
image. In the Create Bitmap Options box, set the Color
Depth to 256 from the drop-down list. The Dithering
option should be set to None, Optimized Palette is fine.
Click the Bitmap Size tab. The default of 96 should be
4.
the current value; if the size reads 800 pixels or more
in either Height or Width you're in good shape—click
Create.
Choose Utilities | Bitmap Tracer. Set the Trace mode
5.
to Limited Color. Then set Remove Noise to about 80
(ignoring any trace of color variation), set the Minimum
Area to 8 (the individual representations of the original
pixels are quite large now), set the Final Color Tolerance
to about 30 for good separation and high quality, and set
the Accuracy to 100 and Smoothing to 0. Click Trace,
check to see that about 800 objects will be produced,
and then click Insert. You now have a seriously
pixellated vector version of the icon.
If you'd like to try this with images and drawing of your own, try pressing PrintScreen while the
Clipart Gallery is open in Xara, when you have a photo or drawing loaded. Xara builds terrific
small thumbnails of your work.
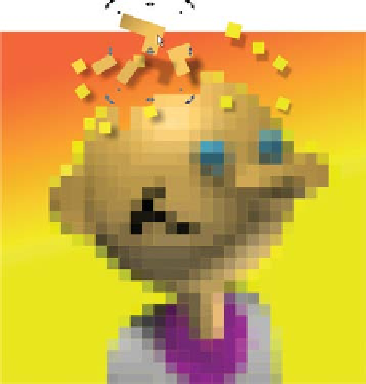
6.
Get creative and play with the hard
rectangles against something such
as a smooth gradient background.
Delete the yellow background areas,
create a rectangle, put it to back, and
fill it with something cartoonish.
Ungroup the objects or
7.
CTRL
-click
on specific objects to rotate a few
shapes. The audience will be a little
startled to view what appears to
be an enlarged bitmap icon with
“rotated” pixels in it. Add drop
shadows by using the Shadow Tool,
making them a few pixels larger or
smaller than the original.
You can examine get your head together.xar, the completed tutorial file. You can also name the
file something more inspired!