Graphics Programs Reference
In-Depth Information
Adding Perspective
The Perspective mode of the Mould Tool is similar to the
Envelope except all four bounding lines are straight, and this
cannot be changed. Additionally, when you apply a Perspective
mould, you will see vanishing point marks outside the mould.
You can drag on these marks to create the impression that a
shape vanishes at an imaginary horizon on the page; usually
when you can see a vanishing point on the page, the degree
of perspective applied to the shape is so severe that the
composition looks unrealistic. It's often best to use the Default
perspective and adjust the perspective bounding box points
manually.
Mould Options and Guides for Making
Your Own Mould
Whether you have applied a Perspective or an Envelope style
mould to a shape, you have options that affect the mould itself:
N
To remove a mould at any time
With the Mould Tool
chosen, click the Remove Mould button.
To copy a mould and then apply it to a different
N
shape
With the Mould Tool and the object selected,
click the Copy Mould Shape button to the right of the
Remove button (the pages icon). Then select a new
object, click the Mould Tool on the Toolbar, and click
the Paste Perspective or Paste Envelope button (the
clipboard icons on the Infobar).
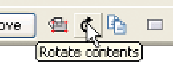
To rotate the target shape
N
It's not uncommon for a
pasted mould to rotate the target shape. Click the Rotate
Contents button; each click rotates the shape 90 degrees
clockwise within the mould.
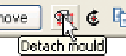
To pick up a little editing speed
N
Halt instant redraws
of moulds by clicking the Detach Mould button to toggle
the mould to a frozen state. You then edit the mould,
click the button again to toggle it off, and the mould
updates and continues to update as you edit.
To use Perspective mould guides
N
You can toggle
on a guide within the shape to get a better idea of the
perspective as you edit. The Toggle Mesh button turns
the mesh on and off within the shape; it's for preview
and is not editable in any way.