Graphics Programs Reference
In-Depth Information
The wonderful thing about vector graphics is that you
can scale them ad infinitum without loss of detail or
focus. Remove the fill by clicking on the No Fill box
to the left of the color line now.
Select the blend group and the circle, and then choose
5.
the Blend Tool.
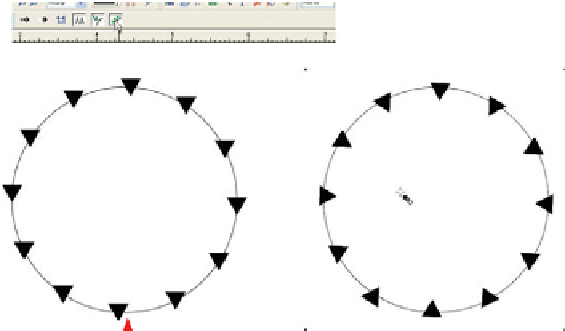
You have your choice of designs now if you chose to
6.
use a triangle tick mark. On the Infobar, click the Blend
Along A Curve
button. Doing this
puts the ticks exactly
where needed for a
watch face design.
However, all the
triangles are in their
original orientation;
it might be novel to
make them all point
toward the center
of the watch. Easy
enough: While the
Blend Along A Curve
button is toggled on,
click its neighbor,
Rotate Along Curve.
First, with the blended blend selected, click a good color on
Rotate Along Curve
Blend Along A Curve
7.
the color line for the ticks. Doing this also fills the circle,
so with the Selector Tool, hold down
CTRL
- and click on
the circle, and then click the Set 'No Color' swatch.
Choose None from the Outline Width drop-down list on
8.
the Standard Bar to hide the circle's outline.
Because the watch image is angled, the ticks don't align.
9.
Yet. The Mould Tool Perspective function is covered
later in this chapter, but there's no reason not to test-
drive it right now to complete the assignment. With your
design selected, choose the Mould Tool, and then click
the Default Perspective button on the Infobar.
You can use the Mould Tool, Selector Tool, or Shape Editor
10.
Tool to align the bounds of the tick marks to the watch face,
as shown in Figure 6-3. Take your time and look at this
figure carefully to see where you should locate the corners
to make the drawing appear to be on the face of the watch.