Graphics Programs Reference
In-Depth Information
Blending a Blend
Just as you can have groups of groups in an Xtreme
composition, you can nest blend groups too. This capability
offers you the design option to create (among many things) a
blend group of shapes that blend around a circle or other shape.
The following tutorial is a real-world design example: You're
going to create ticks for a watch face and then pattern them so
they travel across the face of an image of a wristwatch.
Open Wristwatch.xar; the image layer is locked and there is
a new layer on top for you to design the watch ticks.
1.
Create a small shape you think would be good for the
hour tick marks on a very expensive watch. The figures
in this section show a QuickShape 3-sided polygon
(a triangle) because you can do something interesting
with a blend and an odd-sided polygon. Make the shape
about ¼ inch high and/or wide; once you've built a
shape, select it and then type
.25in
in the W or H field
on the Infobar, and then press
ENTER
.
Duplicate the shape by holding
2.
CTRL
and then dragging
the shape to the right by about 5 inches. Before you
release the mouse button, tap the right mouse button,
and then release both buttons to drop a copy, a duplicate.
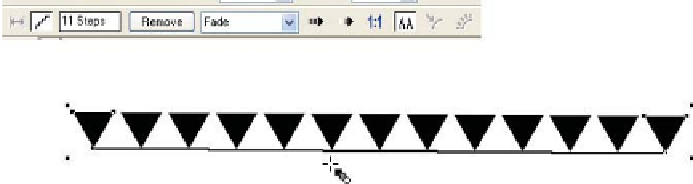
Select both objects and then, with the Blend Tool, drag
3.
from one shape to the other. Big-Trick Time: Because
you will blend the blend group around a circle, and a
watch typically has 12 hour tick marks, you need to set
the number of blend steps on the Infobar to
11
. Type
11
in the steps box and then press
ENTER
. Blending
intermediate shapes around a circle puts the parent
objects in exactly the same location—although the result
is 13 shapes, you'll only see 12 unhidden.
4.
With the Ellipse Tool, hold
CTRL
-
SHIFT
and then drag
a circle until it more or less fits over the watch face.