Graphics Programs Reference
In-Depth Information
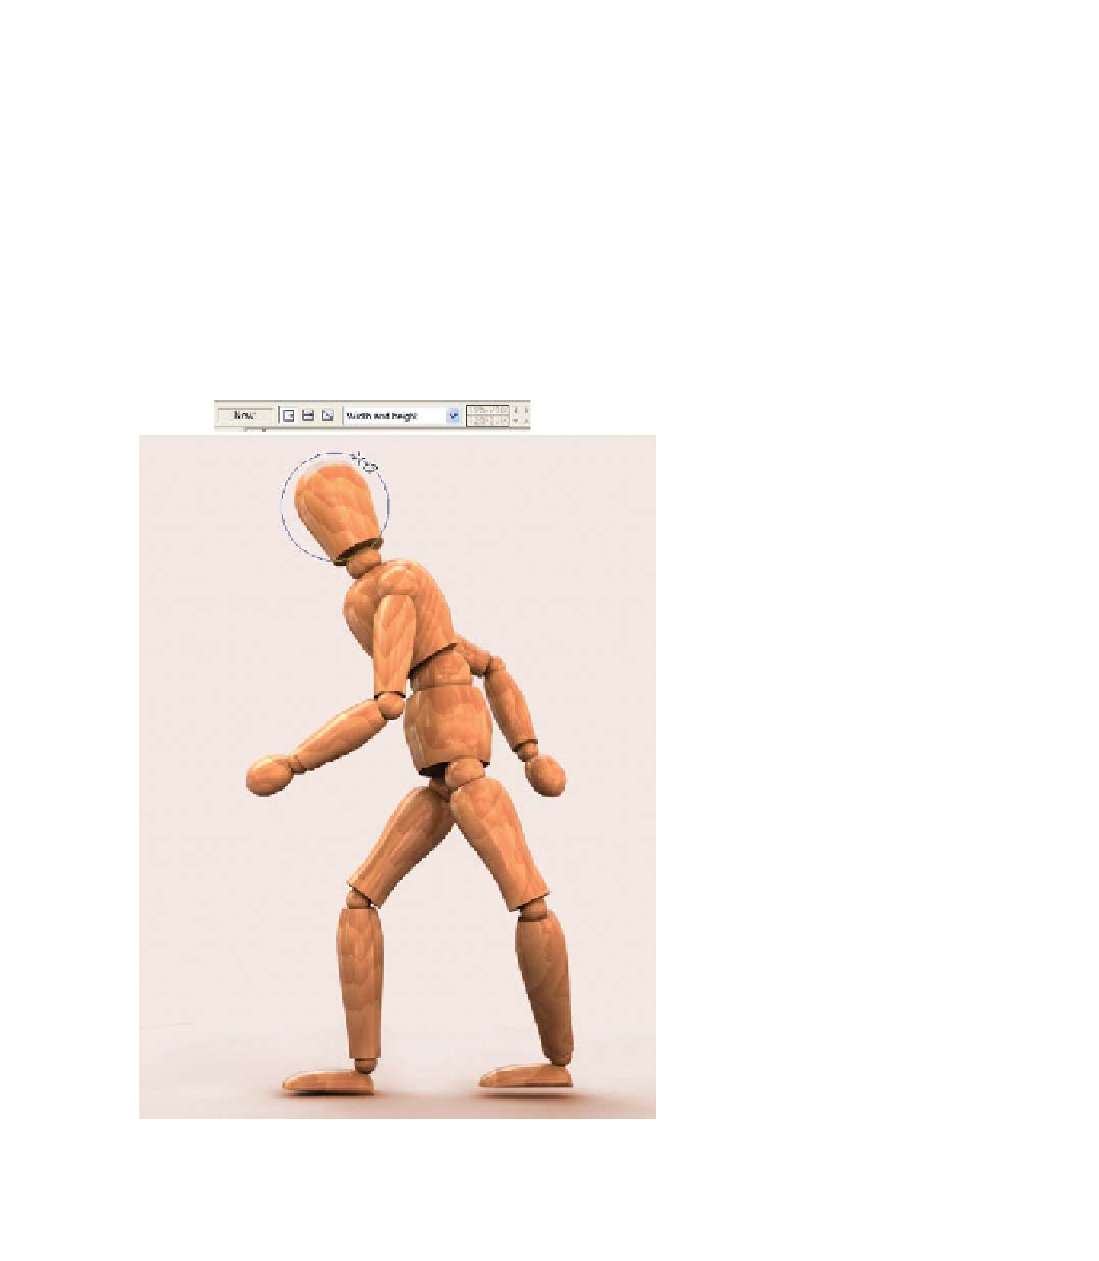
Here's how to build the symbol by creating pieces,
modifying them, and then combining them:
1.
You'll be most comfortable creating shapes with an outline
but no fill so you can see the mannequin for geometric
positioning of shapes. With the Walking.xar document
open, set the line width to 2 or 4 pixels on the Standard
bar. If Xara alerts you that nothing has been selected and
asks if you would like to use this property as the default,
click Set, which means “Yes. Please.” All future shapes
will have a green outline, but only in this document.
Similarly,
2.
SHIFT
-click on a bright green swatch on the
color line and click Set in the attention box. Then click
the No Fill icon to the left of
the color line and click Set
in the Attention box. You're
good to go now.
Choose the QuickShape Tool,
3.
and then click the Radius
Creation (from center) and
Create Ellipses buttons on the
Infobar.
Drag from the center of the
4.
head outward until you've
produced a circle a little
larger than the head of the
mannequin.
Switch to the Rectangle Tool,
5.
and then drag a rectangle about
the proportions of the torso of
the mannequin.
With the Selector Tool, move
6.
the rectangle until its top-right
edge is over the top right of
the mannequin torso. Click on
the rectangle to put it in rotate/
skew mode.
Move the transformation center
7.
to the top-right corner, and
then rotate the rectangle until it
fits over the mannequin torso.