HTML and CSS Reference
In-Depth Information
This is the string that WordPress puts on the front of the names of all the files it creates.
If you already have one WordPress installation using a database, you'll want to change
this prefix to something else so as to prevent the two installs from conflicting. I have cre-
ated a database just for this purpose, so I'll leave the prefix as is.
22
After you have
wp-config.php
in place, you can proceed with the installation. If you
reload the index page in the WordPress directory, you'll be referred to
install.php
,
unless there's a problem with your database configuration. If WordPress can't connect to
the database using the settings you provided, it will print an error message. Make sure
you have all the information on your database entered properly and test your database
connection using this page until WordPress stops complaining.
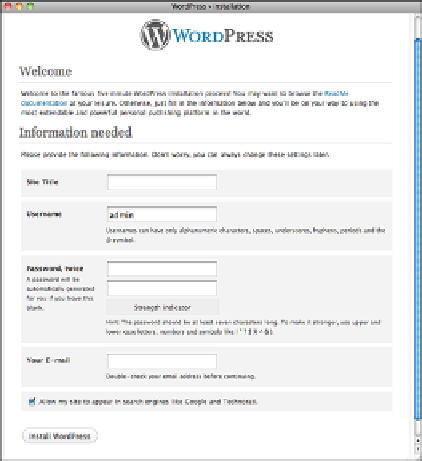
In the first step of the actual installation, shown in Figure 22.6, you pick a name for your
blog, create an administrative user, and enter your email address. After you've done that,
WordPress creates all the database tables it needs and generates an account for you to log
into the system. That's it for installation.
FIGURE 22.6
The WordPress
installation page.
After you've completed the installation, you're presented with the Dashboard for your
blog. It's not all that different from the Control Panel for TypePad. The posting page,
shown in Figure 22.7, is even more similar to TypePad and most other blogging tools.
You can enter the title and body of your post, along with some other optional informa-
tion. The options on the right side enable you to mark your post as draft or published as
well as categorize it. You can select from other options, too.