Graphics Programs Reference
In-Depth Information
Setting KeyF rameS
Setting KeyF rameS
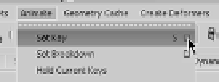
As with many other functions in Maya, you can set a keyframe in several ways. Switch to the Anima-
tion menu set by pressing F2. When you're first starting to learn Maya, the best way is to choose Ani-
mate
➔
Set Key r to display the Set Key Options dialog box. Here, you're selecting the Option box for
that menu item by clicking the little empty box to the right of the menu
item. The Option box for any particular menu item allows you to set the
options for that function. In this case, you're changing the options for
the Set Key function.
If you choose Animate
➔
Set Key without first changing those options, Maya sets a keyframe for all
the keyable attributes for the selected object. Although this
may seem convenient, it makes for a sloppy scene, especially if the scene must be heavily animated.
Having keyframes for attributes that may not actually be animated creates unnecessary clutter.
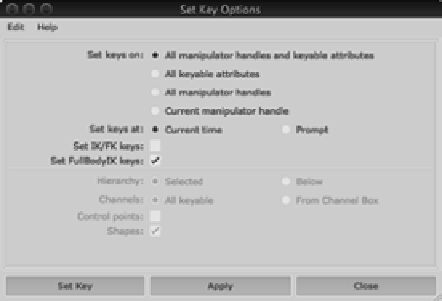
In the Set Key Options dialog box shown here, set the Set Keys On option to All Keyable Attributes
instead of the default All Manipulator Handles and Keyable Attributes. Set Channels to From Chan-
nel Box instead of the default All Keyable. (These attributes will remain grayed out until you change
to All Keyable Attributes.) Now, when you
choose Animate
➔
Set Key, you'll set a key-
frame only for the channels that you specify
explicitly through the Channel Box, giving
you greater control and efficiency. All you
have to do is highlight the channel you want
to keyframe in the Channel Box and then
choose Animate
➔
Set Key. Save your settings
by choosing Edit
➔
Save Settings, and then
click Close to close the dialog box.
As with many other functions in Maya, you can set a keyframe in several ways. Switch to the Anima-
tion menu set by pressing F2. When you're first starting to learn Maya, the best way is to choose Ani-
mate
➔
Set Key r to display the Set Key Options dialog box. Here, you're selecting the Option box for
that menu item by clicking the little empty box to the right of the menu
item. The Option box for any particular menu item allows you to set the
options for that function. In this case, you're changing the options for
the Set Key function.
If you choose Animate
➔
Set Key without first changing those options, Maya sets a keyframe for all
the keyable attributes for the selected object. Although this
may seem convenient, it makes for a sloppy scene, especially if the scene must be heavily animated.
Having keyframes for attributes that may not actually be animated creates unnecessary clutter.
In the Set Key Options dialog box shown here, set the Set Keys On option to All Keyable Attributes
instead of the default All Manipulator Handles and Keyable Attributes. Set Channels to From Chan-
nel Box instead of the default All Keyable. (These attributes will remain grayed out until you change
to All Keyable Attributes.) Now, when you
choose Animate
➔
Set Key, you'll set a key-
frame only for the channels that you specify
explicitly through the Channel Box, giving
you greater control and efficiency. All you
have to do is highlight the channel you want
to keyframe in the Channel Box and then
choose Animate
➔
Set Key. Save your settings
by choosing Edit
➔
Save Settings, and then
click Close to close the dialog box.
3.
Change the remainder of the shaders as follows:
Mercury
Orange-brown
Venus
Beige-yellow
Earth
Blue
Mars
Red-orange
Jupiter
Yellow- green
Saturn
Pale yellow
Uranus
Cyan
Neptune
Aqua blue
Pluto
Bright gray
Figure 2.15 shows the shading groups.