Graphics Programs Reference
In-Depth Information
Applying a Simple Shader
To help distinguish one gray planet from another, attach simple shaders to each of the
planets to give them color. You can easily take care of this task using the Hypershade
window. Follow these steps:
1. Choose Window
➔
Rendering Editors
➔
Hypershade to open the Hypershade window.
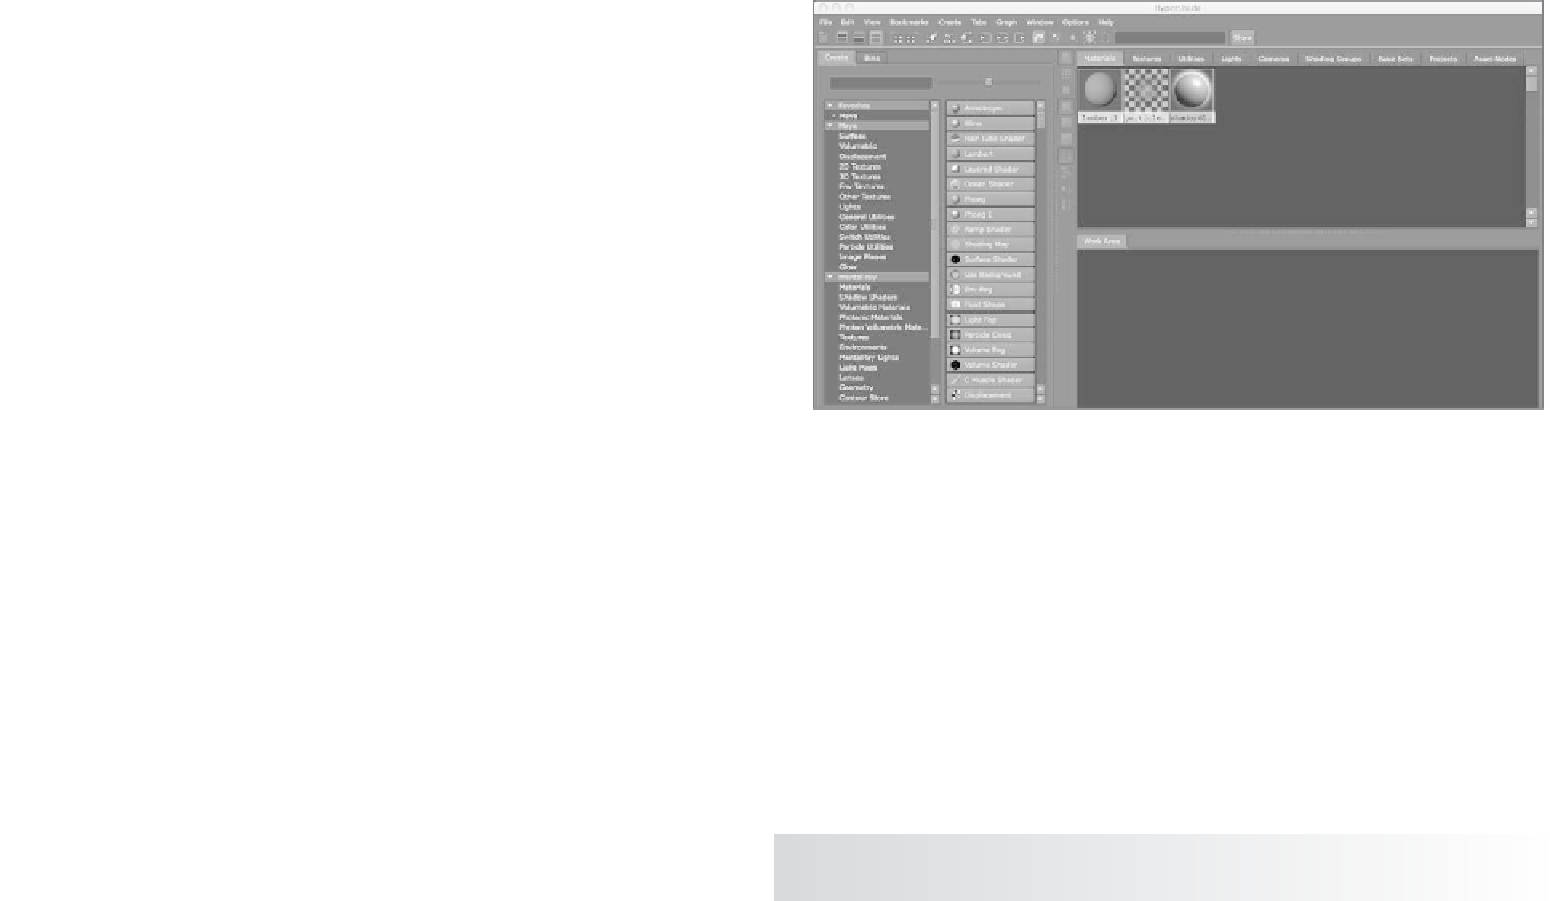
This window lists and allows you to edit all the shaders and textures in the scene.
With this window, you create the look of your objects by assigning colors, surface
properties, and so on. You'll notice three default (or initial) shader icons already
loaded. (See Figure 2.12.) For more on the Hypershade window, see Chapter 3.
Figure 2.12
The Hypershade
window
2. In the Create Maya Nodes panel on the left of the Hypershade window and under
the Surface heading, click the Lambert icon (a gray sphere) to create a new Lambert
shader node. It appears in the top and bottom of the Hypershade window. Click this
icon eight more times to create a total of nine Lambert shading groups in the Hyper-
shade window.
3. Click the first of the new Lambert nodes (lambert2) in the Hypershade window, and
you should notice its attributes display in the Attribute Editor on the right of the UI.
If you have the Channel Box displayed instead, double-click the shader's icon to open
the Attribute Editor. At the top, replace lambert2 with
Mercury_Color
to identify
this material as the one you'll use for Mercury.
4. Name each of the remaining planets in your animation (Venus, Earth, Mars, Jupiter,
Saturn, Uranus, Neptune, and Pluto).
To rename a node in the Hypershade window, you can also right-click the node's icon and
choose Rename from the shortcut menu that appears.