Graphics Programs Reference
In-Depth Information
7. Now for the toon outlines. Select all the
parts of the wagon, and select Toon
➔
Assign Outline
➔
Add New Toon Outline.
A black outline appears around the outside
of the wagon's parts, and a new node called
pfxToon1 appears in the Outliner or Hyper-
graph. The outlining is accomplished with
Paint Effects.
8. Before you render a frame, set the back-
ground to white to make the black toon
outlines pop. To do so, select the persp
camera, and open the Attribute Editor.
Under the Environment heading, set the
Background Color to white.
9. Open the Render Settings window, and set the renderer to Maya Software. Render a
frame, and compare to Figure 12.48. The outlines are too thick!
Figure 12.48
The black outlines
are applied, but
they're too thick.
The mental ray renderer doesn't render Paint Effects by default. You have to render with
Maya Software rendering to be able to see Paint Effects strokes. To see Paint Effects with
mental ray, you must convert the paint effects to polygons, a procedure not covered in this
introductory text.
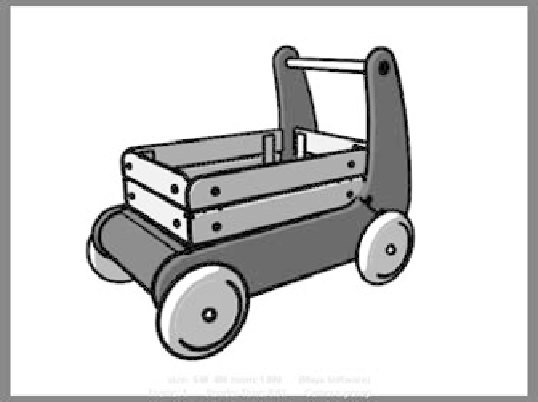
10. Select the pfxToon1 node in the Outliner, and open the Attribute Editor window.
Click the pfxToonShape1 tab to open the attributes for the outlines. Set the Line
Width attribute to 0.03, and render a frame. Compare to Figure 12.49.
Figure 12.49
The cartoon wagon!
You can adjust the colors and the ramps of
the Fill shader to suit your tastes, and you can
try out the other Fill shader types, such as a
three-tone shader to get a bit more detail in the
coloring of the wagon. Adjust the toon outline
thickness as you like, and have some fun play-
ing with the toon outline's attributes to see how
they affect the toon rendering of the wagon.
This should be a quick primer to get you into
toon shading. The rest, as always, is up to you.
With some playing and experimenting, and
you'll be rendering some pretty nifty cartoon
scenes in no time.