Graphics Programs Reference
In-Depth Information
8. Create a poly plane, and scale it up to 50 in
X
and
Z
. Place it under the box to make a
f floor. Its default gray Lambert shader is fine for now. (See Figure 10.63.)
9. Open the Render Settings window, and select men-
tal ray as the renderer. This also automatically turns
on raytracing, which you need for the shadows from
the key and fill lights. Render a frame in the render-
Cam view.
Figure 10.63
Create a floor plane.
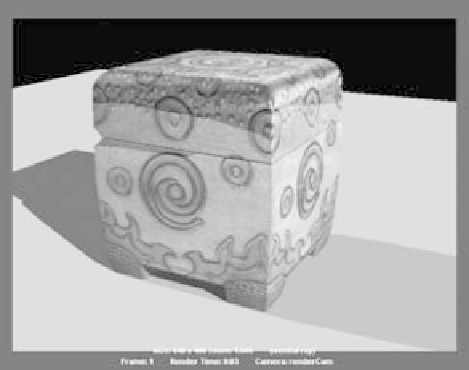
Figure 10.64 shows the first render with these three
lights. Notice that the gray floor is reflecting in the
box because you have a Phong shader assigned to
it. You can use texture maps to adjust the reflective
areas of the box and dial in the proper reflections in
the next chapter as you render.
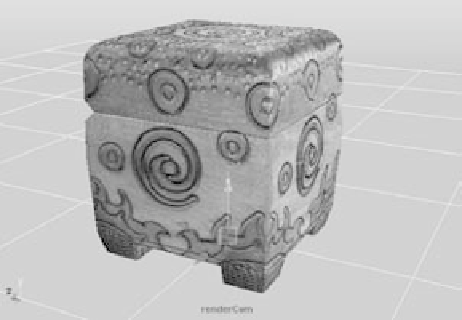
10. Select the key light (directionalLight1), and open
the Attribute Editor. In the Raytrace Shadow Attributes heading, set a Light Angle
of 3.5 and Shadows Rays of 64. Render. The primary shadowing on the f floor looks
much nicer.
Select the fill light (directionalLight2), and set its Light Angle to 7 with Shadow Rays
of 72 (see Figure 10.65). Play with the radii and number of rays to get the shadows
to your liking. Notice how much longer the render takes with soft shadows enabled.
You can temporarily use fewer Shadow Rays on your lights until you're ready for final
renders, to save yourself some time. Just don't forget to turn those attributes back up
to their full-quality looks!
Figure 10.64
The render doesn't look too bad with just the three-point
lighting.
Figure 10.65
Much nicer shadows on the floor