Graphics Programs Reference
In-Depth Information
Controlling the Pump Arm
Next, you need to attach the pump arm to the wheel arm so that it pumps back and forth
as the control wheel turns. If you simply group the pump arm with the end joint of the
wheel arm's bone, the pump arm will float up and down as it pumps back and forth.
You need to use a constraint to force the pump arm to move back and forth only in the
Z-
axis:
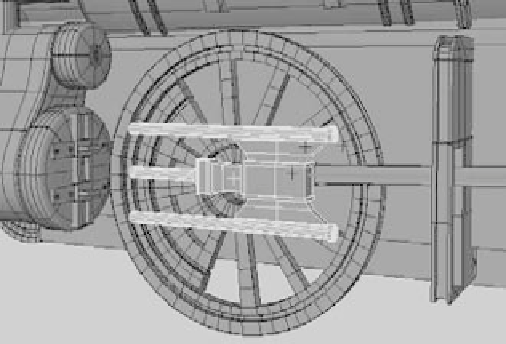
1. Make sure the control wheel is set back to 0 rotation. Select the pump arm, templated
in Figure 9.70 so that you can see through to the wheel arm and joint, and line up its
pivot with the end joint of the wheel arm bone.
2. Select the end joint (called joint2), Ctrl+click the pump arm group in the Outliner
(called pump_arm_LT_side), and, in the Animation menu, choose Constrain
➔
Point
r
. In the option box, uncheck All under Constraint Axes, select only Z to
constrain the pump arm only in the
Z-
axis, and click the Add button. Now, if you
rotate the control wheel, you see the pump arm and wheel arm connected. The pump
arm pumps back and forth, although you'll immediately notice a need to adjust the
model to make the piece fit when it animates. Figure 9.71 shows that the pump arm's
geometry isn't yet quite right for animation. This is very normal for this process and
luckily needs only a quick fix.
Figure 9.70
line up the pivot of
the pump arm with
the end joint of the
wheel arm joint.
Figure 9.71
The pump arm
is too short!