Graphics Programs Reference
In-Depth Information
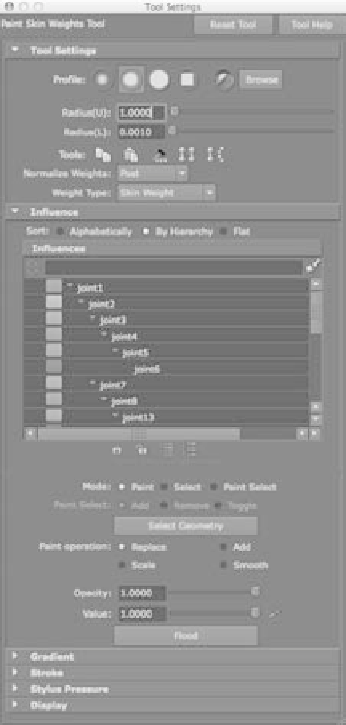
2. Your hand should turn black, with a bit of light gray at the wrist. The option box
appears, listing the joints that are connected to the hand, as shown in Figure 9.42.
3. The color value (between white and
black) determines how much binding
inf luence the selected joint in the option
box is exerting on that part of the geom-
etry. It's best to name your joints properly
so that selecting from this window is
easier and more intuitive. If you loaded
the file from the CD, you need to name
the joints yourself to organize the scene
and make working with it easier.
4. In the option box, make sure the Paint
Operation button under the Paint Weights
section is set to Replace. Change the Value
slider to 0. In the Tool Settings section,
Radius(U) and Radius(L) govern the size
of your brush. In the Inf luence section,
make sure the Opacity slider is set to 1.
To change the size of your Artisan Brush
while you're painting weights, you can hold
down the B key and drag the mouse left
or right to adjust the radius of the brush
interactively.
5. Click and paint the black value around
parts of the hand and palm that shouldn't
be affected by the index finger bending at
its top knuckle, as shown in Figure 9.43.
Figure 9.42
The option box for the Paint Skin Weights tool
Skin weights must always be normalized in a smooth bind, meaning the values have to add
up to 1. When you reduce the influence of a joint on an area of the surface, the influence
amount is automatically shifted to other joints in the hierarchy that have influence over that
area; those joints are now more responsible for its movement.
6. Smooth out the area where it goes from white to black. In the Tool Settings window,
set Paint Operation to Smooth. Right-click to smooth the area around the knuckle
for a cleaner deformation. Your index knuckle should now bend beautifully.