Graphics Programs Reference
In-Depth Information
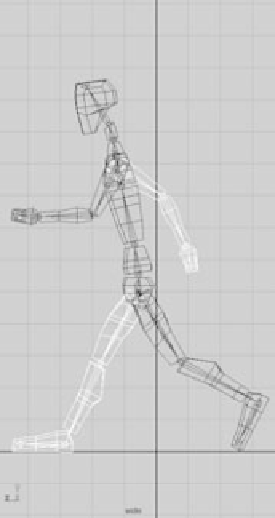
Figure 9.21
The sixth pose
(frame 25)
2. Rotate the front (dark) leg back behind the man,
and swing the white leg up and ready to take the
next step. Lower the body to keep the now rear
foot (the dark one) on the ground.
Frame 30
Use Figure 9.22 as a guide for creating the next pose.
Notice that it's similar to the pose at frame 10 (in
Figure 9.18). As a matter of fact, the only major differ-
ences are which leg and arm are in front. Everything
else should be about the same. You'll want some vari-
ety in the exact positions to make the animation more
interesting, but the poses are very similar.
Completing the Cycle
You've finished a set of poses for the character's first
step. The next set of poses for your walk cycle cor-
responds to the first set, but now the other leg and
arm correspond to these positions. For example, you
animated the left leg taking a step forward in the first
series of poses. The next series of poses has to do with
the right leg. The pose at frame 35 corresponds to the
pose at frame 15. Frame 40 matches frame 20. You can
start a new series of poses with the left leg.
When a 30-frame section is complete, you need to
return to the animation through the Graph Editor.
Adjust all the keyframes that you set at five-frame
intervals to make the animation more realistic. Right
now, you have only the gross keyframes in place, so
the timing is off. Your next step is to time the frames
properly. This is ultimately a matter of how the anima-
tion looks to you.
Logistically speaking, some poses take a little less
time to achieve than the evenly spaced five frames you
used. For example, achieving the second pose from the
start position should take four frames. The third pose
Figure 9.22
The seventh pose
(frame 30)