Graphics Programs Reference
In-Depth Information
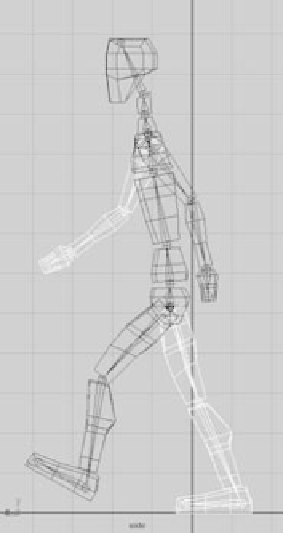
Figure 9.17
The second pose
(frame 5)
5. Bend the man forward at the waist, bend
neck_1 forward, and tilt the head back up
to compensate a little. Figure 9.17 shows the
pose at this point.
6. Select everything in the Outliner, and set a rota-
tion key. You're setting a pose for all the joints,
which will ensure that all the body parts are in
synch.
If you don't key everything every step of the way,
some parts of the body won't key with Auto Keyframe
properly because the last time they moved may have
been two steps previous.
Frame 10
Figure 9.18 shows the position you'll keyframe at
frame 10; it's approximately midstride for the first leg:
1. Go to frame 10. Rotate the back leg out farther,
and level the foot. Lower the body to place the
man on the ground.
2. Rotate the front leg out, straighten the knee, and
f flatten the foot to place it on the ground. This is
midstride. Swing the arms in their current direc-
tion a touch more. Bend the torso forward some
more. Make sure you set a key for all the joints.
Figure 9.18
The third pose
(frame 10)
Frame 15
Figure 9.19 shows the position you'll keyframe at
frame 15. At this point, the character begins to shift
his weight to the front leg as it plants on the ground,
and the character also begins lifting the back leg:
1. Go to frame 15. Rotate the front leg back toward
the body, and raise the body as the man steps to
keep the front foot f flat on the ground. Rotate the
back knee up to lift the foot, and rotate the foot
down to make him push off the toe.
2. Start swinging the arms in the opposite direc-
tion. Start straightening the torso back up, but
bend the head forward a bit.