Graphics Programs Reference
In-Depth Information
Notice the single, blue connecting line between the fractal1 node and the bump2d1 node in
the Hypershade. This means the alpha channel of the fractal feeds the amount of bump that is
rendered on the tireShader. You have to alter the alpha coming out of the fractal node with the
positioning ramp to block the rim from having any bump. The white areas of the ramp allow an
output in alpha from the fractal, which creates a bump for the surface; whereas the black area of
the ramp keeps any bump from appearing. Because you already used this ramp to position the
Rim shader and the Tire shader on the wheel, it will work perfectly for the bump position as well.
Figure 7.60
MMB+drag the
ramp to the Alpha
Gain of the fractal.
6. Select the fractal to display it in the Attribute Editor, and
MMB+drag the wheelPositionRamp in the Hypershade to the
Alpha Gain attribute for the fractal, as shown in Figure 7.60.
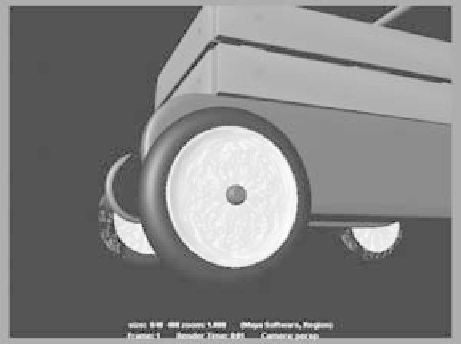
7. Render a frame, and you see that now the tire has no bump
and the rim is bumpy (Figure 7.61).
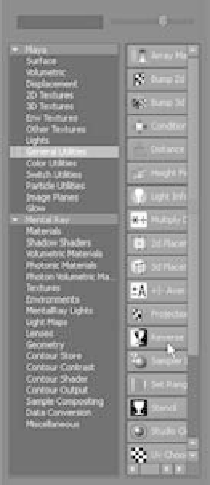
8. This is easy enough to fix. All you need to do is reverse the
ramp and then feed it into the Alpha Gain of the fractal so that
the tire is bumpy and the rim is smooth. In the Hypershade,
in the Create pane on the left, click the Maya
➔
General Utili-
ties heading, and then select the Reverse icon to create a reverse
node in the Hypershade window. See Figure 7.62.
9. In the Hypershade, MMB+drag the wheelPositionRamp node
onto the Reverse node, and select Input from the context menu
when you release the mouse button. This connects the output of
the ramp into the reverse node, which will then reverse the effect
of the ramp on the fractal when you connect it in the next step.
Figure 7.61
The tire is smooth and now the rim is bumpy.
Figure 7.62
Create a reverse node.