Graphics Programs Reference
In-Depth Information
7. Delete the middle (green) color by clicking the square to the right of green's position.
Select the bottom (red) color by clicking its round handle on the left of the ramp. Change
the Selected Color attribute to white. Drag it all the way to the bottom of the ramp.
8. Select the top color (blue), and change it
to black. Drag the handle down the ramp
to a Selected Position of 0.105. Figure 7.26
shows the ramp position and the axe. If
you're in Texture Display mode in the per-
spective view (press the 6 key), you see that
the tip of the model is a blue-gray color
(metal) and the bottom of the handle is a
reddish brown (wood). As you adjust the
position of the white color on the ramp,
notice how the spike and handle change.
9. In the Hypershade, choose Edit
➔
Delete
Unused Nodes to purge all unused shad-
ing nodes from your scene. Make sure
your Layered shader and Metal shader are
assigned, of course.
10. Render out a frame of the axe. Save this
frame in the render buffer by clicking Keep
Image ( ) in the Render View window.
This keeps the image so you can scroll back
to it for reference. A scroll bar appears at
the bottom of the Render View window.
Figure 7.26
The Ramp texture
is set on the wood's
Transparency attri-
bute controls where
the wood and
metal meet.
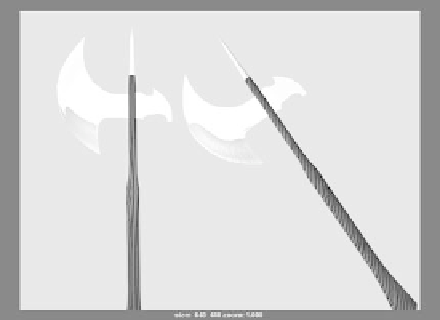
11. Select the axe's top node, and rotate it about 45 degrees in
Z
to angle it. Render a
frame at this point. Notice how the grain of the wood has changed. Use the scroll bar
to toggle back and forth and
compare these two images, as
shown in Figure 7.27.
When a projected texture, such
as the wood, doesn't “stick” to
an object, and the object seems
to move through the texture,
the object is said to be
swim-
ming
through the projection.
The wood is being projected
by the 3D placement node
Figure 7.27
The wood grain
changes as the
axe moves.