Graphics Programs Reference
In-Depth Information
Figure 6.129
Place the railing
meshes back in their
proper groups.
5. Now that you have notches, you need screws in them. You don't need to model the
entire screw, just a screw head that you replicate many times. Create a poly cylinder
with Axis Divisions of 16 and Height and Cap Divisions of 1. Size the cylinder to be
a touch smaller than the diameter of the notches. Scale it down to make the cylinder
into a fairly f flat disk, as shown in Figure 6.130.
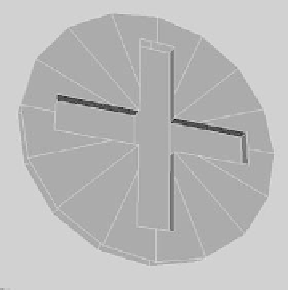
6. Create a poly box, and scale it down to fit into the screw head. Push the cube slightly
into the disk. Copy the cube, and rotate it 90 degrees to create a cross in the screw
head, as shown in Figure 6.130. Don't set the cross through the screw head, but about
3
⁄
4
deep into it.
7. Select the disk and then the first cube, and choose Mesh
➔
Booleans
➔
Difference
to cut a slit into the screw head. Select the screw head mesh and the next cube, and
apply another Difference Boolean to cut a cross in the disk, as shown in Figure 6.131.
Figure 6.130
Create a disk and a cross for the
screw head.
Figure 6.131
The screw head is almost finished.
8. Delete the history on the screw head.
9. You must do one more little thing for the screw head. Select the vertices at the mid-
dle of the cross, and scale them away from each other to add a bit of eccentricity to
the screw head, as shown in Figure 6.132.
10. Select the top vertices at the end of each notch, and squeeze them together to taper in
the tips of the notch in the screw head. See Figure 6.133. Center the pivot point, and
name the mesh
screw
.
11. Duplicate the screw head and place one into each notch of the railings. You can use
Snap to Points if you'd like to place them exactly into the notches in the wood, but
make sure they sink only a little into the notch. You don't want the surface of the