Graphics Programs Reference
In-Depth Information
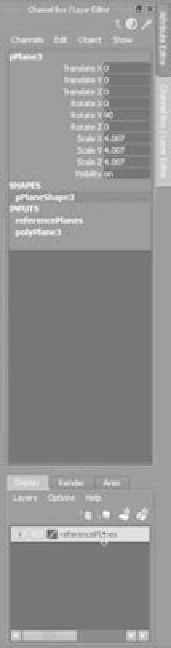
Figure 6.16
The new layer in
the Layer Editor
13. Select all three reference planes, RMB+click the referencePlanes layer, and choose
Add Selected Objects from the context menu. For more on the Layer Editor, see
“The Channel Box/Layer Editor” section in Chapter 3, “The Maya 2011 Interface.”
To toggle the display of the reference planes to get them out of the way, simply toggle
the box to the extreme left of the layer name. It's currently checked with a V for
Visible in Figure 6.16.
Save your work, and “version up” so you don't write over your previous scene files. You
can load the scene file
RedWagonModel_v01.ma
from the
Scenes
folder of the RedWagon proj-
ect on the CD to check your work or skip to this point. Just make sure to set your project
to the RedWagon project on your hard drive after copying the entire project from the CD.
To remain in step with this chapter, make sure Interactive Creation is turned off when you
create a new primitive.
Modeling the Side Panels
Now that your reference is all set, let's get to work building the model. Here is where the
sweat comes in. There are many ways to model the same object, but they all basically stem
from the same procedures you've seen in the previous chapters.
Shaping the A Panel
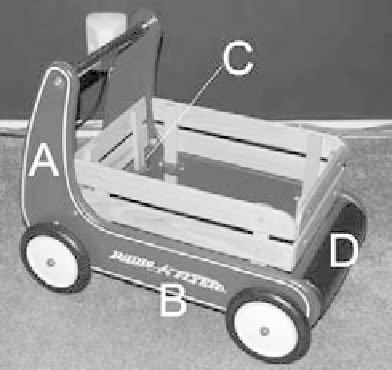
You'll start with the first side piece, marked A in Figure 6.17. Follow these steps:
1. Enter the Polygons menu set. Create a default poly cube, and place it in the side view
in front of the A piece, as shown in Figure 6.18.
Figure 6.17
You'll build the wagon in this order.
Figure 6.18
Place a poly box for
the first side.