Graphics Programs Reference
In-Depth Information
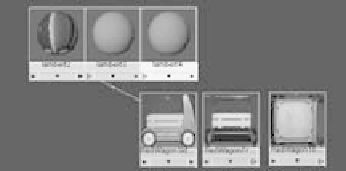
3. Before you can assign the images to their respective planes, you must create shaders
for each of the planes. In the left panel of the Hypershade window, click the Lambert
icon three times to create three new Lambert shaders, as shown in Figure 6.9. For
more information about shaders and texturing, see Chapter 7.
4. While still in the Hypershade work area and while holding down the Ctrl key,
MMB+drag the side-view photo swatch onto the first Lambert shader icon. Maya
automatically maps the image to the color of the Lambert shader, as shown in Fig-
ure 6.10. You can also MMB+drag the image to the Lambert Shader icon and then
choose Color from the context menu that appears.
Figure 6.9
Create three new
Lambert shaders.
Figure 6.10
Connecting the
image to the shad-
er's color
5. Ctrl+MMB+drag the other two images onto their respective Lambert shaders to
connect them.
6. Assign the shaders to the reference planes. To do so, MMB+drag the Lambert
shader that is connected to the side-view image to the side-view plane in the
Perspective panel. Switch the perspective view into Texture mode by pressing 6
while in that panel. You should see the image of the wagon appear, as shown in
Figure 6.11.