Graphics Programs Reference
In-Depth Information
7. Save your file, and compare your work to the scene file
Starfish_v02.ma
in the Star-
fish project on the CD.
8. Right-click the starfish, and choose Display Level
➔
2. The vertices on the next higher
detail level appear and are represented by 2s. At this level of detail, you can move
these vertices to give your starfish more character. Try making the areas between the
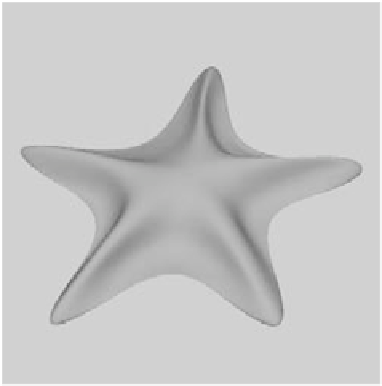
points on the star smoother, as shown in Figure 5.81. Also try to f flatten the bottom
of the starfish using either level 1 or level 2 vertices.
9. To achieve the appearance shown in Figure 5.81, you may need to detail your starfish
further in some areas. As it stands now, the starfish can be edited up to level 2. To cre-
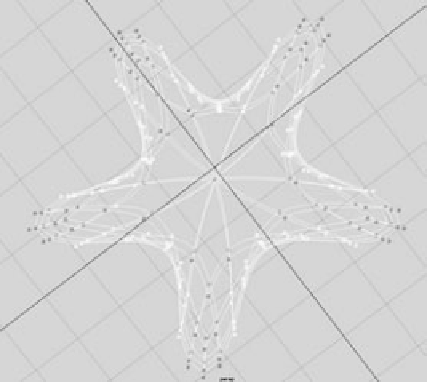
ate another level of detail, select the areas you want to refine by selecting the level 2
vertices along the outside of each star point, as shown in Figure 5.82.
10. With those vertices selected, right-click the selection, and choose Refine Selected
from the marking menu. Maya adds another level of detail to that area of the starfish
with vertices marked as 2s. This allows you to make more detailed adjustments to the
surface to mold it to your liking. Work the vertices at all levels to sculpt your starfish
so it looks similar to the one in Figure 5.81.
Right-clicking the starfish and choosing Refine Selected is the same as selecting the vertices
and choosing Subdiv Surfaces
➔
Refine Selected Components. Choosing vertices in an area
of your model and refining them beyond a display level of 2 creates more vertices for that
area only. You can continue to refine your selection as needed. At any time, you can go back
to Polygon Proxy mode to access the lowest level of detail and adjust the broad strokes of
the model.
Figure 5.81
A molded starfish
Figure 5.82
Select the area to be refined.