Graphics Programs Reference
In-Depth Information
4. Connecting the upper and lower cylinders is next.
Select the edge isoparms of both cylinders, and
choose Surfaces
➔
Loft
r
. Check to make sure to
keep Section Spans to 2 in the Options box and click
Apply. Repeat to create a loft on the back side of the
cylinders as well. Figure 5.39 shows the resulting
surfaces.
5. Individually select the middle hulls of both of the
lofts, and move them back to create a bit of cur-
vature to the surfaces, as shown in Figure 5.40.
Remember, you can select hulls by right-clicking
the surface and using the marking menu.
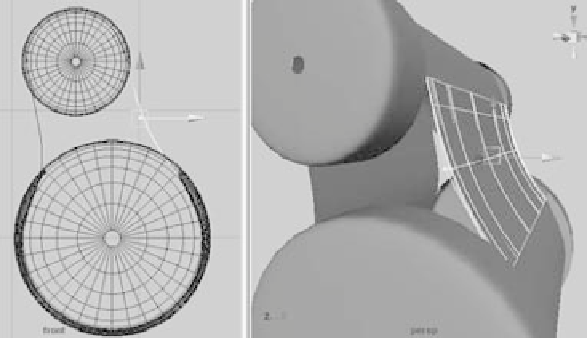
6. Select the edge isoparms of the lofts you just created, and loft between them with
two spans. Make sure you reset the settings by choosing Edit
➔
Reset Settings in the
Options box, and then set Section Spans to 2 spans before you create the loft. Repeat
for the other side. Figure 5.41 shows the closed ends.
Figure 5.39
Lofting the two
cylinders together
Figure 5.40
Move back the
middle and
lower-middle hulls.
Figure 5.41
Closing the sides