Graphics Programs Reference
In-Depth Information
16. Press Enter to add four new edges and hence four new faces along the back of the
hand for the knuckles. Select each of those new faces, and choose Edit Mesh
➔
Poke
Face to subdivide them into four triangles, with a vertex in the center. A special
manipulator appears. Use the
Z
translate handle to pull those middle vertices up to
make knuckles (see Figure 4.26).
17. Now that you have a simple hand, you can smooth out the mesh to make it less boxy.
In Object mode, select the hand, and press 2 to see a preview of what the hand will
look like after it's smoothed. Press 1 to exit the smooth preview. Choose Mesh
➔■
Smooth
r
; in the option box, set Division Levels to 2, and leave the other options at
their defaults (see Figure 4.27).
18. Click Smooth. Your hand should take on a smoother, rounder look—more like a
real hand—and it should roughly resemble the preview. This time, however, you've
altered the geometry and actually made the mesh smoother and given it a higher
density of polygons. Notice all the nodes listed under INPUTS in the Channel Box
in Figure 4.28. This is because History has been on for the entire duration of this
exercise. At any time, you can select one of those nodes and edit something—the
extrusion of the pinkie, for example. You don't need to do any of this now, so with
the hand selected, choose Edit
➔
Delete By Type
➔
History to get rid of all those extra
nodes. (Feel free to edit any of those nodes through the Attribute Editor if you like.)
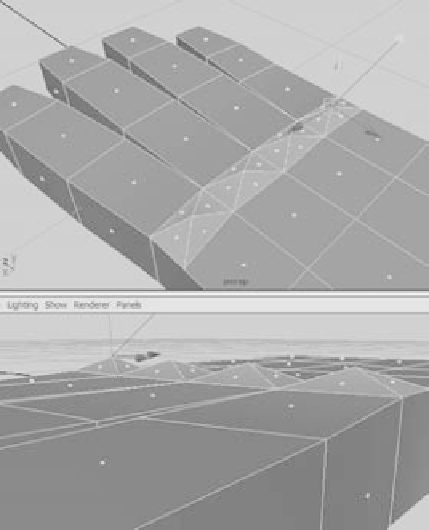
Figure 4.26
Use the Poke Face tool to raise the knuckles.
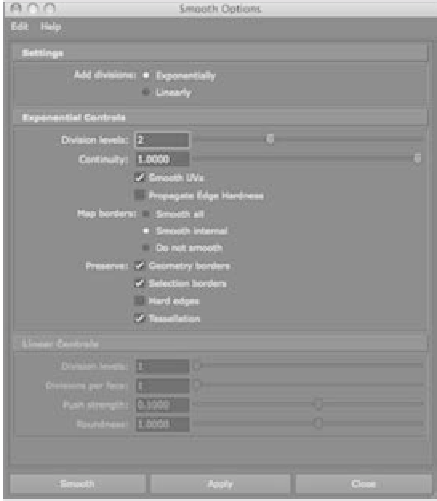
Figure 4.27
Set the options for the Smooth operation.