Graphics Programs Reference
In-Depth Information
To create a new layer, click the Create New Layer icon ( ). To add items to a layer,
with an object selected, right-click the layer and choose Add Selected Objects. You can
also use the layers to select groups of objects by
choosing Layers
➔
Select Objects in Selected Layers
or by right-clicking the layer and choosing Select
Objects. To change the name and color of a layer,
double-click the layer to open the Edit Layer dialog
box, as shown in Figure 3.6.
You can easily resize this area by clicking and dragging the left side wall of the panel.
(See Figure 3.7)
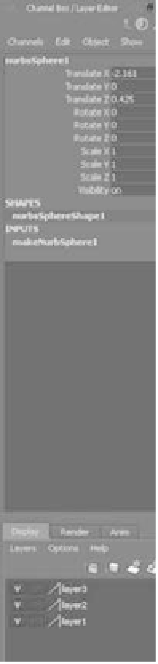
This area of the screen is usually used for the Channel Box and the Layer Editor. You
can replace this panel with one of two other windows—the Attribute Editor or the Tool
Settings—by clicking one of the three icons in the upper-right corner, as shown in the
Channel Box/Layer Editor section. This gives you quick access to the three windows you
find most useful to have onscreen all the time. You may want to display the Channel Box
all the time.
Figure 3.6
The Edit Layer
window
Figure 3.7
The Channel Box/
Layer Editor
Time Slider/Range Slider
Running horizontally across the bottom of the screen are the Time slider and the Range
slider, as shown in Figure 3.8. The Time slider displays the range of frames available in
your animation and gives you a gray bar, known as the
Current Time indicator.
You can
click it and then drag it back and forth in a scrubbing motion to move through time in
your sequence. (When instructed in this topic to
scrub
to a certain point in your anima-
tion, use this indicator to do so.)
The text box to the right of the Time slider gives you your current frame, but you can
also use the text box to enter the frame you want to access. Immediately next to the cur-
rent time readout is a set of DVD/DVR-type playback controls that you can use to play
back your animation.
Below the Time slider is the Range slider, which you use to adjust the range of anima-
tion playback for your Time slider. The text boxes on either side of this slider give you
readouts for the start and end frames of the scene and of the range selected.
You can adjust any of these settings by typing in these text boxes or by lengthening or
shortening the slider with the handles on either end of the bar. When you change the range,
you change only the viewable frame range of the scene; you don't adjust any of the animation.
Figure 3.8
The Time slider and
the Range slider
Scrub bar
Current frame
Playback controls
Range bar handles
Range end frame
Range start frame
Character Set
Selection menu
Auto
Keyframe
Animation Preferences
Scene end frame
Scene start frame