Hardware Reference
In-Depth Information
Configure Time Machine
To activate Time Machine, all you need to do is tell it what destination to use:
1. Open the Time Machine pane of System Preferences.
2. Click Select Backup Disk.
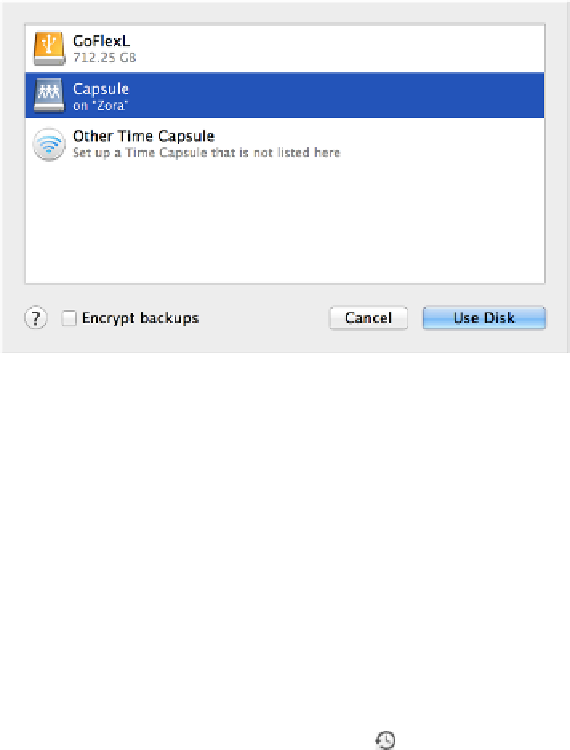
A dialog appears (
Figure 28
), listing all volumes eligible to be a destination
disk (including external hard drives and Time Capsules) and the amount of free
space on each.
Figure 28:
Available local and network volumes appear in this
window; select the one you want to use and click Use Disk.
3. Select a volume, and click Use Disk. (If you're using a Time Capsule for the very
first time, select Set Up Other Time Capsule, click Open AirPort Utility, and
follow the instructions.)
IntheTimeMachinepreferencepane,themasterswitchautomaticallymovesfromOfftoOn,
and a timer begins a 2-minute countdown before your first backup begins. (You may prefer
to turn it off until you've excluded files from Time Machine, which I talk about next.)
At any point, you can flip that switch On or Off. When it's off, that means only that Time
Machine doesn't run automatically; you can still run it manually, at any time, by clicking and
holding (or right-clicking) on the Time Machine Dock icon and choosing Back Up Now, or
by choosing Back Up Now from the Time Machine menu in the main menu bar. (If you
don'tseetheTimeMachine menu,youcanenableitwiththeShowTimeMachineinMenu
Bar checkbox in the Time Machine system preference pane.) You can turn off Time Machine
temporarily if need be, but
please don't leave it off
. Remember, backups are most valuable
when they're automatic!