Graphics Reference
In-Depth Information
3. Create a New Capture
(
Figure 7-2
) that we didn't want to print. To
remove major unwanted features, use the
Select Faces tool to highlight them, and then
Delete them. (Or highlight your model, click
Invert Selection, and delete everything but
your model.)
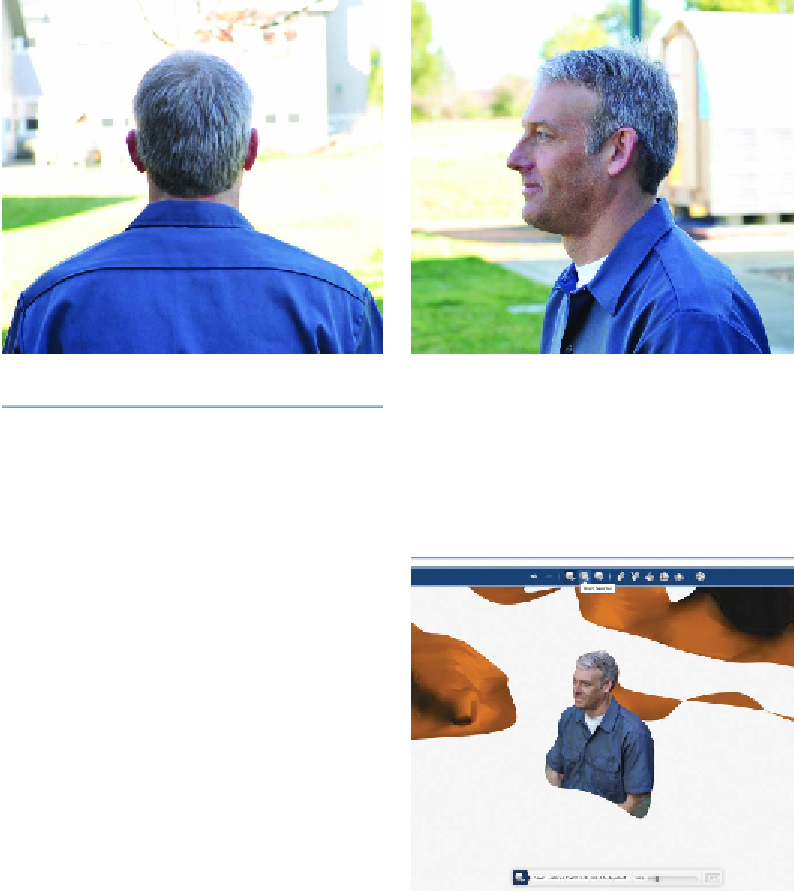
In 123D Catch, upload all of your head pho-
tos. In the Model Resolution pull-down
menu, select High (For Fabrication). Give
your model a name and click Create Model.
Autodesk's servers will automatically stitch
all your photos together to make a 3D model,
and then put the model in your My Projects
section.
4. Open Your 3D Model
You're looking at yourself as a 3D model! It's
got a realistic texture, like your original pho-
tos. You can Dolly, Pan, and Orbit to move
your view around, by using those three but-
tons on the righthand toolbar.
On the same toolbar, select Material & Out-
lines to see the 3D mesh that's underneath
the texture. Cool!
Figure 7-2.
Background elements
5. Edit Your 3D Model
To snip a horn (
Figure 7-3
) from your head,
use the Delete & Fill tool, then use the
Smooth Brush to round it off (
Figure 7-4
).
Trim your model to size and save it under a
new name.
My 3D model had a crazy horn on the back
of my head, maybe because we took some
photos that were blurry or too far away. It
also
captured
background
elements