Information Technology Reference
In-Depth Information
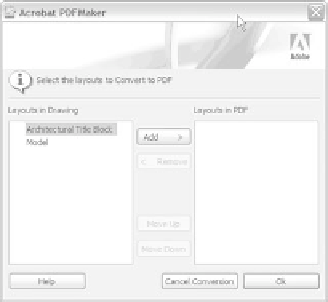
Figure 6.3
The wizard lists the views
4. Click a view in the Layouts in Drawing column then click Add to move it to the Layouts in PDF
column. In our example, we add both Model space (named
Model
) and Paper space (named
Architectural Title Block
).
5. Reorder the Layouts in PDF list if desired; click a layout and then click Move Up or Move Down. In
our example, Model is moved to the top of the list.
6. Click OK to display the next pane of the wizard. On this pane, define how the layer structure will be
exported from the DWG file. In the example, I selected Retain all or some layers, which allows me
to use the rich data inside the DWG file (Figure 6.4). To strip the layer structure from the PDF file,
select Flatten all layers.
Figure 6.4
Select the layer structure for the PDF
7. Click Continue to display the next pane of the wizard, where we will add more intelligence to the
PDF file. In Figure 6.5, you see all the AutoCAD layers in the left column.
8. Right-click the column at the left of the wizard to open a shortcut menu and choose Select All; then
click Add Layers to copy the list to the right column (Figure 6.6).
9. In this case, our AutoCAD DWG file did not include any Layer Groups, but we can easily add them
in the wizard. Shift-click to select the layers for grouping in the right column on the wizard, and then
right click and choose Create a new Layer Set from the shortcut menu. Type a name for the layer
set: ours is named Walls.

Search WWH ::

Custom Search