Java Reference
In-Depth Information
How It Works
The circle is generated by the button down point defining the center and the cursor position while drag-
ging as a point on the circumference. A circle is a special case of an ellipse, and a shape that is an el-
lipse is defined by the top-left corner and the width and height of the rectangle that encloses it. The
distance()
method that is defined in the
Point2D
class calculates the radius, and this value is used to
calculate the coordinates of the top-left corner of the enclosing rectangle, which is stored in
position
.
The width and height of the rectangle enclosing the circle are just twice the radius value, so the circle is
stored as an
Ellipse2D.Double
object at
origin
with a width and height as twice the radius.
Because of the way a circle is drawn, the
modify()
method has to recalculate the
position
coordinates
as well as the width and height. The other methods in the
Element.Circle
class are much the same as
you have seen previously.
Drawing Curves
Curves are a bit trickier to deal with than the other shapes. You want to be able to create a freehand curve
by dragging the mouse, so that as the cursor moves the curve extends. This needs to be reflected in how you
define the
Element.Curve
class. Let's first consider how the process of drawing a curve is going to work
and define the
Element.Curve
class based on that.
The
QuadCurve2D
and
CubicCurve2D
classes are not very convenient or easy to use here. These are ap-
plicable when you have curves that you define by a series of points together with control points that define
tangents to the curve. A curve in Sketcher is going to be entered freehand, and the data that you get is a
series of points that are relatively close together, but you don't know ahead of time how many there are go-
ing to be; as long as the mouse is being dragged you collect more points. You won't have any control points
either. This gives us a hint as to an approach you could adopt for creating a curve that keeps it as simple as
possible.
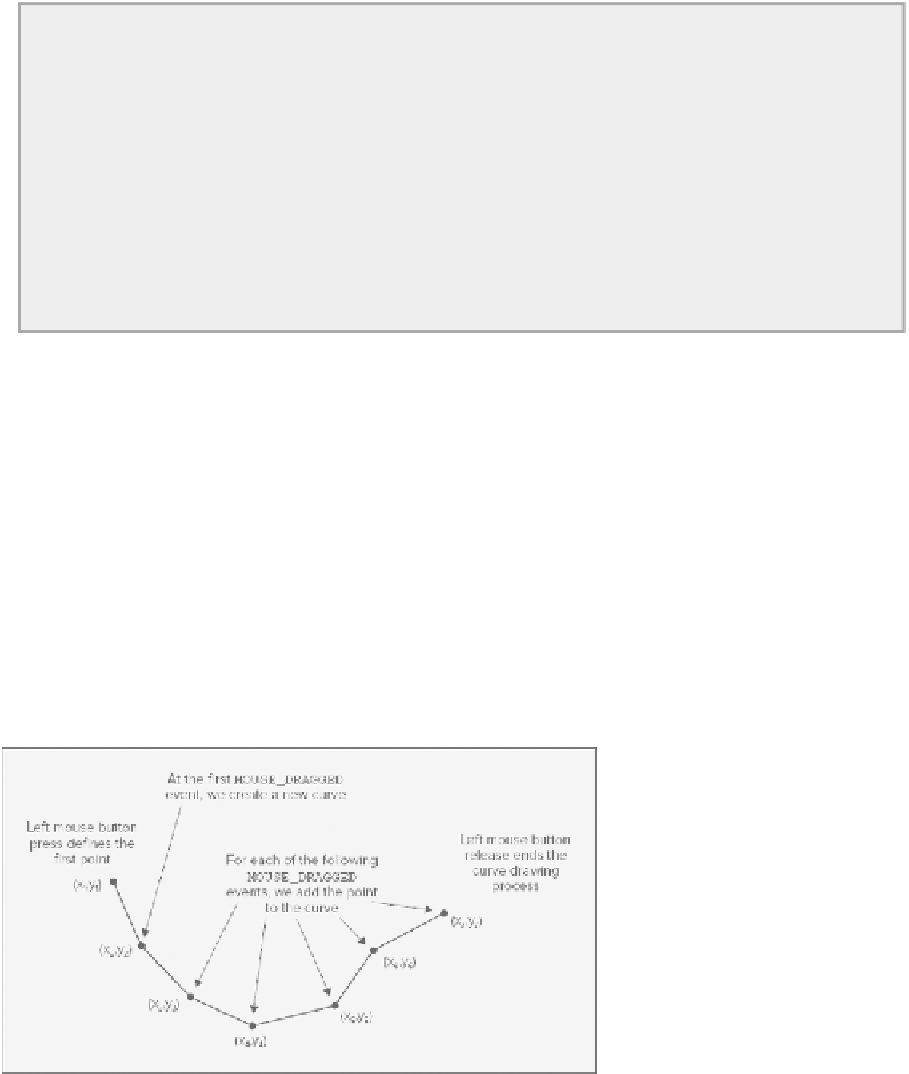
Figure 19-28
illustrates the approach you could take.
Successive points that define the freehand curve are quite close together, so you could create a visual
representation of the curve by joining the points to form a series of connected line segments. Because the
lengths of the line segments are short, it should look like a reasonable curve.