Graphics Reference
In-Depth Information
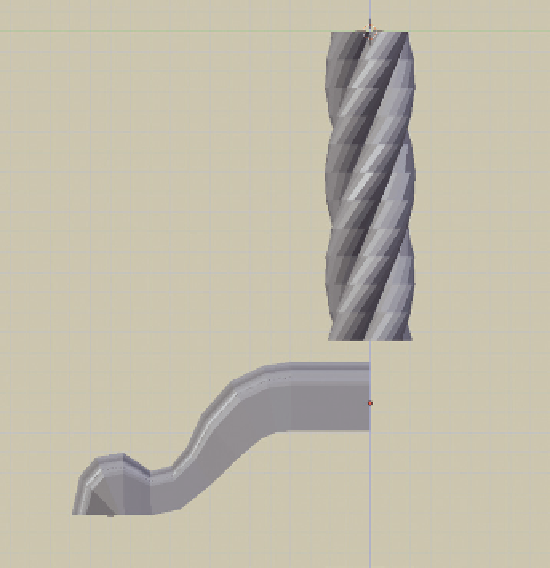
Reselect the leg (just RMB on it so the
selection of the column is cleared) and
G-key move it orthogonally (either left/
right or up/down) into a position like
the one shown in
Figure 4.36
.
In the Properties window, add an Array
modifier. The Array modifier is complex
and powerful. Its general purpose is to
create offset duplicates of an object. Those
duplicates can be independent of each
other, connected into a single large object,
spread out, overlapped, rotated, or scaled.
All of these properties can be animated,
which gives Array some fantastic capabili-
ties. In fact, check the Web Bucket for
the animation called
array_craziness
to see
what the effect of just Array modifiers and
two animated Empties can do.
As it is a powerful modeling tool, we'll
spend a bit of time looking at it. The
default Array modifier is shown in
Figure 4.37
.
Figure 4.36
One table leg positioned to the bottom.
When it is added, the Array modifier has Constant Offset enabled. This setting tells the modifier to create
copies of the object in question at a constant distance from one another. Obviously, the Count property
indicates exactly how many object copies to create. Adjusting the
x
,
y
, and
z
values under Constant Offset
changes the distance. This is appropriate for creating, for example, the rungs of a ladder, which are a
constant, measurable distance apart.
What if you want the copies to be set end-to-end, though, without gaps? You could determine the exact
size of the object in the N-key properties panel and use that value in the Constant Offset section. Or, you
could disable Constant, and turn on Relative Offset. The
x
,
y
, and
z
values in Relative Offset refer not to
any specific measurement but to the dimensions of the object itself. Thus, a Relative Offset of
x
= 1 would
place each copy exactly one full “object” to the right of the original. Depending on the shape of the model
itself, this might create a continuous surface. Relative Offset is perfect for creating repeating patterns with
meshes. Two Array modifiers on top of one another, one set to Relative X and one set to Relative Y offset,
quickly creates a parquet-style floor from a single tile model, as shown in
Figure 4.38
. The great thing about
modeling with Relative Offset is that you don't have to worry about the exact dimensions of your arrayed
model. As you change the shape and size, the Array modifier adjusts to accommodate.
The last way of creating offset is the most flexible: Add Offset Object. When this is enabled and a valid
object is entered in the data field, array becomes a bit mind-boggling. Offset Object uses the difference in
Search WWH ::

Custom Search