Graphics Reference
In-Depth Information
be useful? Well, the selection of an edge
ring allows you to create a loop cut. A
loop cut is a new edge that runs through
a series of edges like the one selected in
Figure 4.23
. This is one of the major
ways that detail is added when box mod-
eling. Let's examine how.
It would be great to have slightly rounded
edges on the chair, and to have the
center of the seat sink down a bit. You
could just subdivide the entire cube a
number of times, but this would lead to
a lot of useless extra geometry. Loop
cutting adds the ability to etch detail exactly and only where we need it.
Before making this loop cut, switch to Edge select mode (header button or Ctrl-Tab). Hover the mouse
over one of the long top edges of the squashed cube. Press Ctrl-R to ask for a loop cut. A purple line
springs into life and jumps around the cube as you move the mouse. This line is a preview of the cut that
you would make if you LMB clicked now. For our purposes, it doesn't matter which way the cut runs.
Choose one and LMB. The cut is made, and if you move your mouse, you'll find that it slides back and
forth along the cut edges. This allows you to precisely make and place loop cuts with ease. To set it back
to the exact center where it began, type 0 (zero) on your keyboard and press Enter. In the future, if you
want to make a loop cut in the dead center of an edge ring, always LMB once to execute the cut, then
LMB right away again to accept it in the center point without sliding.
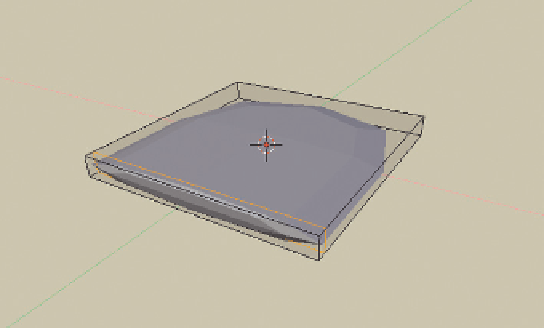
Figure 4.24
A simple (subsurfaced) cube with one edge loop cut and moved.
For now though, let's slide that cut very near to one of the existing sides of the cube. As you do this,
you'll notice that the very curved surface of the subdivision “ball” begins to flatten in that direction. This
is one of the foundations of modeling objects with subdivision surfaces—controlling the “roundness” of
corners by cutting and sliding edge loops.
The result of doing this is shown in
Figure 4.24
.
It should be fairly obvious how we'll proceed. Make another edge loop cut down the middle of the cube,
more or less in the same place as the original, and push it in the other direction, giving you a subsurfaced
object with two relatively flat ends. If you would like to adjust the sharpness or roundness of the object
at any time, all you need to do is Edge Loop select (Alt-RMB) one of the loops and use the Edge Slide
command to move it closer to or farther from the outside edge. Edge Slide is the standalone version of
the last step of the Loop Cut tool. It can be accessed by selecting an edge loop and pressing the E key to
pop up the Edge Specials menu in the 3D view.
Add two more loop cuts, this time perpendicular to the originals, sliding each to opposite ends of the seat.
You'll see that the Loop Cut tool has no problem cutting across the extra geometry, and Edge Slide works
just as well too. When you have these two new cuts made and positioned, you should have something
that looks similar to
Figure 4.25
. If you want to get fancy with this step, you can try making two loop
Search WWH ::

Custom Search