Graphics Reference
In-Depth Information
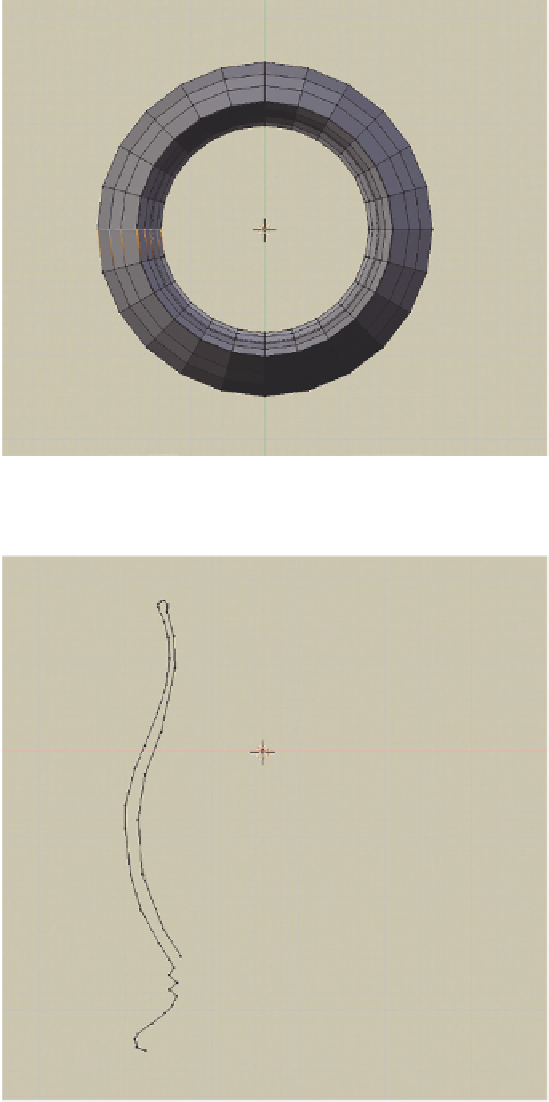
top, but our spun model does. Use Undo
(Ctrl-Z) to remove the Spin operation,
leaving only the original mesh profile.
Back in the original front view, select the
top vertex of the profile and use Ctrl-
LMB to draw a top lip and interior wall
for the vase. Leave the “bottom” open, as
in
Figure 4.19
.
Head back to the top view and use Spin
again. Tweak the tool to 360 degrees, and
somewhere around 24 steps. This time the
result has thickness, with separate interior
and exterior surfaces. It's still open on the
bottom, though. Before we close it in,
let's fix one little bad point on the geom-
etry. When you spin a mesh 360 degrees,
the first and last instances of the profile
land exactly on top of each other. They
don't join up automatically, leading to a
loose edge. To join them, we'll use the
Remove Doubles tool. Use the A key to
select everything in the mesh, then choose
Remove Doubles from the W-key Spe-
cials pop-up menu. Remove Doubles
merges any vertices that are in the same
location. In the vase, this means that the
top vertex of the first instance of the
profile and the same one from the last are
merged, with corresponding sets on down
merging with their counterparts. You may
have to adjust the value on the Tweak
Panel for Remove Doubles to get it to
work properly: 0.01 is the highest you
should need to go. If you don't do this
step, your vase will have a nasty seam
running down one side.
Figure 4.18
Spinning a proile in top view.
With that taken care of, let's close up
both the inside and outside walls. Make
sure that you are in Wireframe view
mode and zoom in on the bottom portion
Figure 4.19
Ready to spin a vase with thickness.
Search WWH ::

Custom Search