Graphics Reference
In-Depth Information
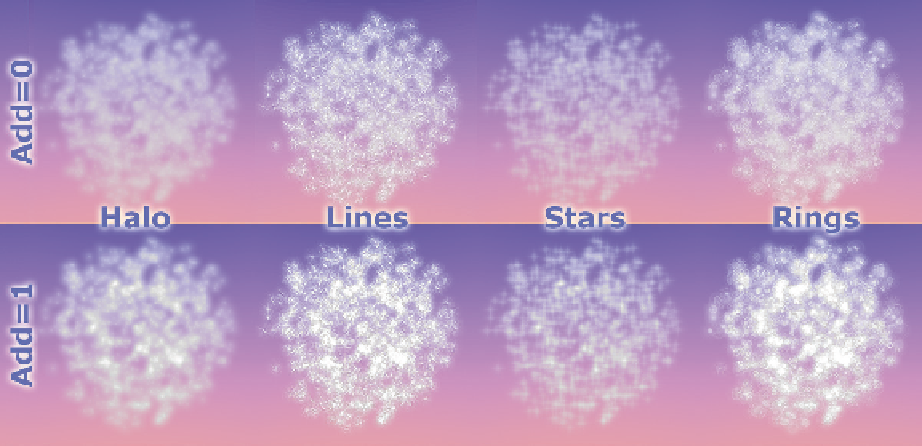
Figure 13.15
Halo Add, with Rings, Lines, and Star.
particle system. With a large number of particles, or a large
halo size, you will probably have to drastically reduce the
Alpha value to get a good result. Conversely, small numbers
of particles will probably require higher Alpha values and
halo sizes to obtain any kind of decent density. Of course,
it all depends on the final effect you're after, but just keep
in mind that halo size, Alpha, and particle count all have a
reinforcing relationship.
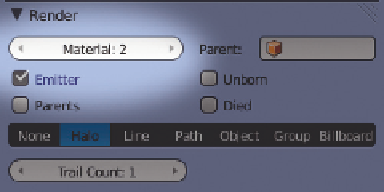
Figure 13.16
Choosing the halo material, and
making sure the emitter object renders.
Since the particle animation isn't a part of the “official”
example, we've added it in the Web Bucket as a standalone animation called
sparkle_time.mpeg
.
The last bit of information you need in order to use the halo material effectively with particles is just a
bit of administration. If you create a particle system on an object like we did with the cube toy and assign
it a halo-based material, you'll find that the emitting object also receives the halo material. When this
happens, each of the object's vertices will render with the halo properties, while faces will disappear. To
prevent this, add a second material to your object to act as the halo properties. You use the same procedure
as you did when adding a second material to the room's floor, except that this time you don't need to
“assign” anything to that material.
Figure 13.16
shows the Render panel of the Particle properties. Note
the toggle for
Emitter
and the
Material
control. Make sure that Emitter is enabled, otherwise the mesh
itself will not render. The Material field controls which material in the object's stack is used for the par-
ticles. In this case, with only a base cube material and the halo-based one, it should be set to
2
, indicating
the second material.
Search WWH ::

Custom Search