Graphics Reference
In-Depth Information
using here is fairly generic and can be used
to create advanced and flexible materials
and textures, too. On the Node Editor's
header, LMB click the rightmost button
on the cluster indicated in
Figure 12.10
.
This sets the Node Editor to compositing,
as opposed to materials or texturing.
When you select this, another series of
options appears on the header. Enable
Use Nodes
to start the fun. You might
think it's silly to have a separate Use
Nodes control—
I'm here
, you think,
so I
obviously want to use nodes!
The control
should probably be called “Evaluate
Nodes,” because that is really what it
toggles. Some nodes that you might add
can take a long time to evaluate, and
having to wait for them each time you
make a small change can become tedious.
Turning off Use Nodes causes Blender to
skip node processing, allowing you to
work more quickly and to re-enable it
once you've adjusted all of your settings.
When you enable
Use Nodes
for the
first time, the simplest of node trees is
created. Shown in
Figure 12.11
, it con-
sists of an
Input
node and an
Output
node. As you can see, the Input node is called Render Layers and represents the sample scene. The Render
Layers node is how you get your rendered scene into the compositor. The Output node is called Com-
posite. The Composite node is the end point of most node trees. It receives the final result of all the
shenanigans that go on before, passing that result back to the renderer to present to you as an image.
Notice also the curved line connecting the image sockets on both nodes.
Node trees are read from left to right. The labeled sockets on the left of the panels are called Inputs, because
they receive information. The labeled sockets on the right side of a node are called Outputs, because they
send out information. The node tree in
Figure 12.11
is actually pretty useless, as you might guess. The
Render Layers node receives the rendered image of the scene. That image is sent out through the Image
output socket, which is connected to the Composite node's Image input socket. The image itself passes to
the Composite node, which returns it to the renderer. In between, nothing happens. That's useless.
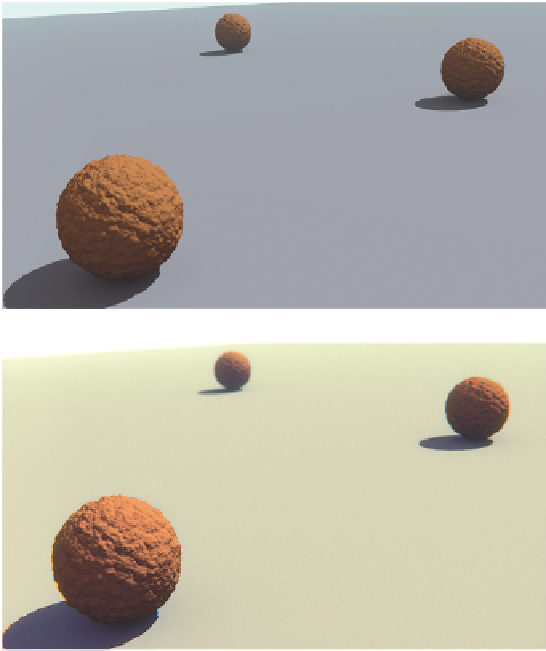
(a)
(b)
Figure 12.9
(a) The image before the compositor, and (b) after the
compositor.
Contrast it with the Glare node tree in
Figure 12.10
. To learn the basics of dealing with nodes, let's turn
the default tree into the Glare node tree. The Node Editor workspace functions just like Blender's other
Search WWH ::

Custom Search