Graphics Reference
In-Depth Information
nothing—you can directly manipulate the bone and move it however you like with the standard
controls.
Whenever you use IK in your rigs, be sure to pay careful attention to the actual range of motion of the
joints in question. You can save yourself a lot of grief later on by accurately transcribing the real-world
limits on joint rotation into IK restrictions.
Unlike work that is accomplished in Edit mode, the constraint work you've been doing in Pose mode is
not mirrored and duplicated for you with the X-Axis Mirror option. You're going to have to add and
configure the IK constraint and restrictions for the other leg by hand.
Finishing the Foot Rig
We've introduced a new wrinkle while creating the reverse foot: bones that should never deform the mesh.
Up until now, all of the bones we've created will be used to directly change the shape of the mesh when
they move. With the reverse foot though, we've added three bones per side—pole target, heel, and ankle—
that are only there for purposes of rigging or control. They should never directly affect the mesh. They
just help to drive other bones that affect the mesh.
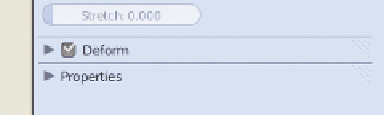
On the
Bone
properties is a simple toggle for
Deform
,
shown in
Figure 9.19
. It should be disabled for these types
of bones. Since you've already added and used these bones,
you can use a shortcut to toggle this property on all of them
at once. First, select them all in Pose mode, then press
Shift-W
in the 3D view. This brings up the “toggle prop-
erties” menu. Select
Deform
from the pop-up, and Deform
will be turned off for all selected bones.
Figure 9.19
The Deform option.
More High-Level Control
The addition of IK legs and feet to the rig has caused a neat and useful thing to happen. In Pose mode,
grab the main control bone that protrudes backward from the base of the spine. Translate it. Recall that
the upper legs, spine, and pelvis are all children of this bone. Before using IK on the legs, the lower leg
bones took their commands from the upper leg bones. Since IK reverses the causal relationship, this is no
longer the case. Now, moving the control bone, which in turn moves the upper legs, has no effect on
the heads of the lower leg bones. They stay glued to the feet. So, this control bone has become a control
bone only for the upper half of the body.
This is cool, and is your primary method for having your character do things like sit, squat, and even
walk. It is now the center of your character's gravity.
But what if you still want to move the entire rig at once in Pose mode? Add another bone in Edit mode. This
overall bone is usually called the “base” or “root” bone, and is often located at floor level.
Figure 9.20
shows
the character's armature with just such a bone in place. To make it an effective base bone, select both the
previous central control bone and each of the heel bones, and make them the disconnected children of this
new bone. Jump into Pose mode to move it, to make sure that all the bones in the rig come along with it.
Search WWH ::

Custom Search