Graphics Reference
In-Depth Information
Disable
Auto IK
and head back to Edit mode. We're going to make some feet.
Note
From now on, we're not going to give you step-by-step instructions when it comes to adding and
placing bones. Remember the different methods:
●
Shift-A adds a bone at the 3D cursor.
●
E key extrudes a connected child if extruding from a bone's tail, but just a standard bone when
extruding from a head.
●
Shift-E extrudes while mirroring across the armature, if X-Axis Mirror is enabled in the tool
shelf.
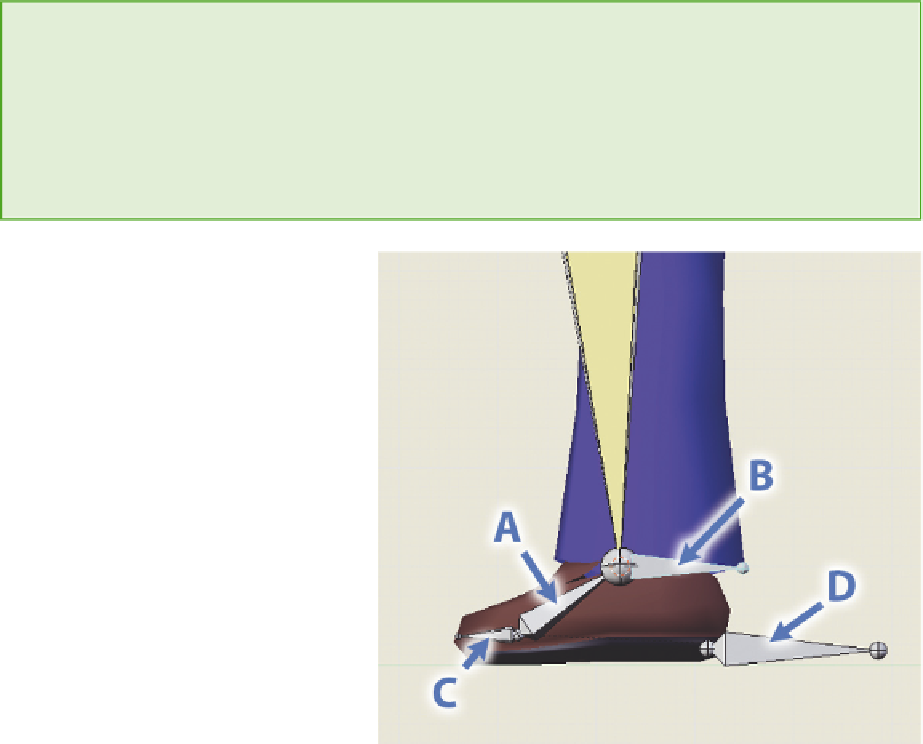
The Reverse Foot
The “reverse foot” is a tried-and-true
foot rig that is fairly easy to build, yet
provides a nice set of controls for anima-
tors.
Figure 9.12
shows the foot bones.
To build it, add a bone (A) that runs
from the center of the pad of the bottom
of the foot (where the toes begin) to the
bottom of the lower leg bone, then
extrude a connected child (B) bone back
and away. To get the joint between the
two bones to line up exactly with the tail
of the lower leg bone, RMB select the
bottom of the leg bone, then press
Shift-S for the Snap menu and choose
Cursor to Selected
. Select the joint,
press Shift-S again, and choose
Selected
to Cursor
. This moves the joint to the
exact location of the head of the leg
bone.
Figure 9.12
The reverse foot.
Extrude a bone (C) from the ball of the foot to the tip of the toe. Finally, add a bone (D) that begins at
the base of the heel and extends backwards, away from the foot. That's all the bones we need. To link it
up, make the foot bone (A) and the toe bone (C) the disconnected children of the heel bone (D).
Now for the fun. Go into Pose mode and first RMB select the connected child (B), then Shift-RMB
select the lower leg bone. Press
Shift-I
and choose
To Active Bone
from the menu that pops up. This
shortcut adds an
IK constraint
to the lower leg bone, targeting bone B. Switch two of your Properties
windows to show the
Bone
and
Bone Constraint
contexts, seen in
Figure 9.13
. Notice on the Bone
Constraint context that a panel exists called
IK
. Constraints on bones operate a lot like modifiers do with
meshes. You only need to make one adjustment to the default settings in order to start playing around:
Search WWH ::

Custom Search