Graphics Reference
In-Depth Information
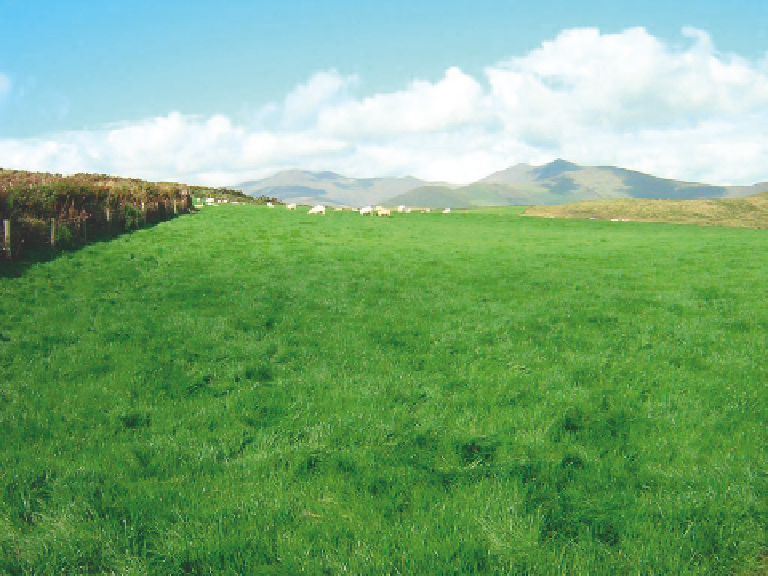
Figure 7.53
An image to be used as a matte. (Creative Commons Attribution 2.0 Generic, Francois
Schnell.)
There are several ways to accomplish this in Blender, but the simplest is to project UV coordinates from
the camera.
Figure 7.53
shows the background image I've chosen for the scene: a plain with green hills,
leading up to a mountain, a cloudy sky in the background.
What we are going to do is to create some geometry that roughly matches the elements in the
picture, from the Camera view. The biggest trick is getting things in the right perspective. Usually I begin
with a large mesh plane for the ground. Looking at the matte image, I try to estimate how high the camera
that took the shot is off the ground, then place my Blender camera that same height above the ground
plane.
Using the
Background Image
section of the N-key 3D view properties bar, enable the background
image and set it to show your matte. Temporarily alter the pixel dimensions in the Render properties to
match the dimensions of the image you are using. The sample image is 1024 × 768 pixels.
Enter Camera view (Numpad-0) and see how things are lining up. Ideally, you want your 3D horizon to
match the horizon in the image. If your guess about the height of the camera off the ground is good (or
even close), you should be able to match horizons by selecting the camera itself (the outline of the camera
is selectable even in Camera view) and rotating it on its local
x
axis (R key, then the X key twice).
Search WWH ::

Custom Search