Graphics Reference
In-Depth Information
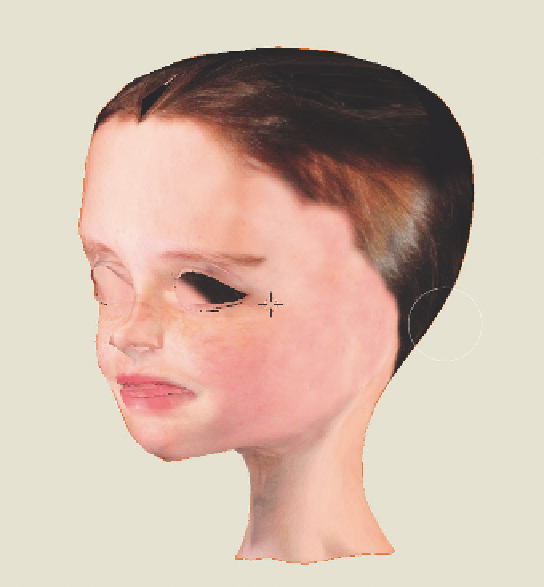
> Mode > Grayscale). Sharpen it to bring
out the detail in the skin; this will create
the roughness (GIMP: Filters > Enhance
> Sharpen: 85). The goal with a bump
map like this is to provide contrast—the
more the better. You can always choose
to reduce the amount of Normal influ-
ence in the texturing panel. Remember
though that we are looking for contrast
on a small level, pores and such, so just
opening the Contrast control and crank-
ing it up will not work. Oversharpening
is usually a good solution. A grayscale,
oversharpened version of the face map is
shown in
Figure 7.39
. Save this as a new
file called something like “face bump
.png.”
Creating an image for specular intensity
is a little more involved, but still
fairly simple. Reopen the original color
texture image, and convert it to grayscale
again. This time, reduce the contrast by
about 50% (GIMP: Colors > Brightness-
Contrast > Contrast: −75). The image really flattens out, resulting in a mostly middle-of-the-road gray.
Using a smoothly feathered brush in Dodge mode (or just using the Dodge tool in Photoshop) set to about
10% opacity, paint over the areas of the face that are considered “shiny”: the nose, cheekbones, and chin.
You can also paint a little above the eyebrows and on the forehead. The goal is to lighten these areas
so that they give more specular intensity when mapped onto your model. Of course, you control the
overall levels within Blender's Influence panel. A final image for specularity should look something like
Figure 7.40
.
Figure 7.38
A nicely textured head, from two references.
Heading back to Blender then, disable the Shadeless option on the head's material. Create two new texture
channels, setting each to use an Image type texture, and to use UV coordinates and the “final face unwrap”
UV channel on the Mapping panel. Title the textures appropriately (“head bump” and “head specular”).
For the bump texture channel, load the bump image you created in your paint program. Disable the Color
influence and enable Geometry Normal. Some rule of halves experimentation after the first render leads
me to a very low number for this: 0.025. On the specular texture channel, load the image you created
for shininess. Disable Color influence and enable Specular Intensity. Make sure that Specular Intensity
within the main material is set to 0.0. The Diffuse Intensity is around 0.65, so the Specular shouldn't go
above 0.35. Set the Specular Intensity influence value to 0.35, then, so that the absolute brightest spot in
the image map receives that much specularity, while everything else gets reduced accordingly.
Search WWH ::

Custom Search