Graphics Reference
In-Depth Information
Texture CD
. To achieve the proper scale,
x
and
y
repeat have been set to
6 and 4, respectively, as determined by test rendering the table and com-
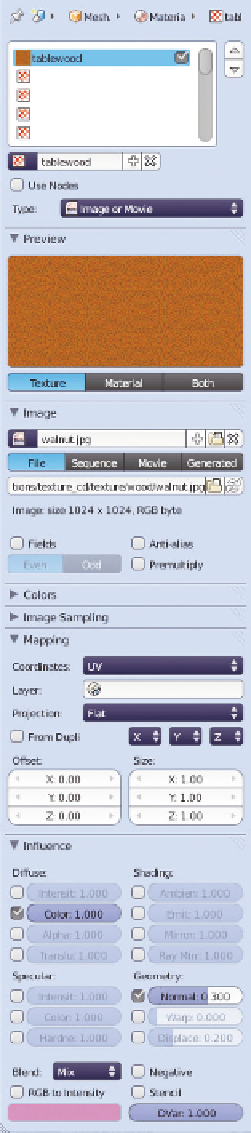
paring it to the reference. We're replacing the Diffuse Color entirely, so
that factor in the Influence panel is enabled and set to 1.0 (100%). Even
though the reference table is varnished, there is still some roughness to it
that mostly follows the wood image. So, Normal is enabled as well, and
test rendering determines that a value of 0.30 is appropriate.
The Mapping coordinates are set to UV. We're going to hold off on the
true guts of UV unwrapping just one more time, and teach a shortcut first
(Wow! How often does that happen? Certainly not in math class.) You
already know that UV unwrapping lets you control how a 2D image is
mapped onto the surface of 3D geometry. In Section 7.4, we'll really get
into the nuts and bolts of creating high-quality unwraps for use with things
like characters. However, for environmental items like this table, there is
a shortcut that often is more than good enough.
Smart Project
is a feature that examines your model, tries to guess how
it's constructed, then performs a UV unwrap for you based on that analysis.
If the result is good enough, your work unwrapping the object is done. To
generate UV coordinates for the table, then, select it and go into Edit mode.
Use the A key to select all vertices. Bring up the Unwrap menu with the
U key and choose
Smart Project
. If your table has as many vertices as
mine, Blender might actually stall for a few seconds as it looks at the geom-
etry. For a look into the mind of Smart Project, you can bring up a UV
Editor window to see the raw result. It slices your object into what it con-
siders distinct surfaces. While you're in the UV Editor, use the A key to
make sure that everything is selected there and choose the
Pack Islands
operation from the
UV
menu on the header. It takes all of the tiny little
islands of UV mesh and packs them into the available UV space. The finished
result is shown in
Figure 7.22
. When you're finished, Tab out of Edit mode.
Smart Project is so easy to use and hits the mark so often that it is always
worth a try. Even with Blender's superior unwrapping tools, unwrapping
by hand can still be a bit of a pain. Any of the objects in your scene that
Smart Project can take care of for you represents probably about an hour
of time that you can devote to something else.
The table now has main material properties, UV mapping coordinates, and
a texture applied that varies both the color and roughness. The only thing
we still need is a variation of shininess. We could use the same wood
texture, but let's try a new trick: generic dirt maps. If the table were brand
new and sitting in some overpriced furniture store, it would shine like a
Figure 7.21
Texture channel for
wood.
Search WWH ::

Custom Search