Graphics Reference
In-Depth Information
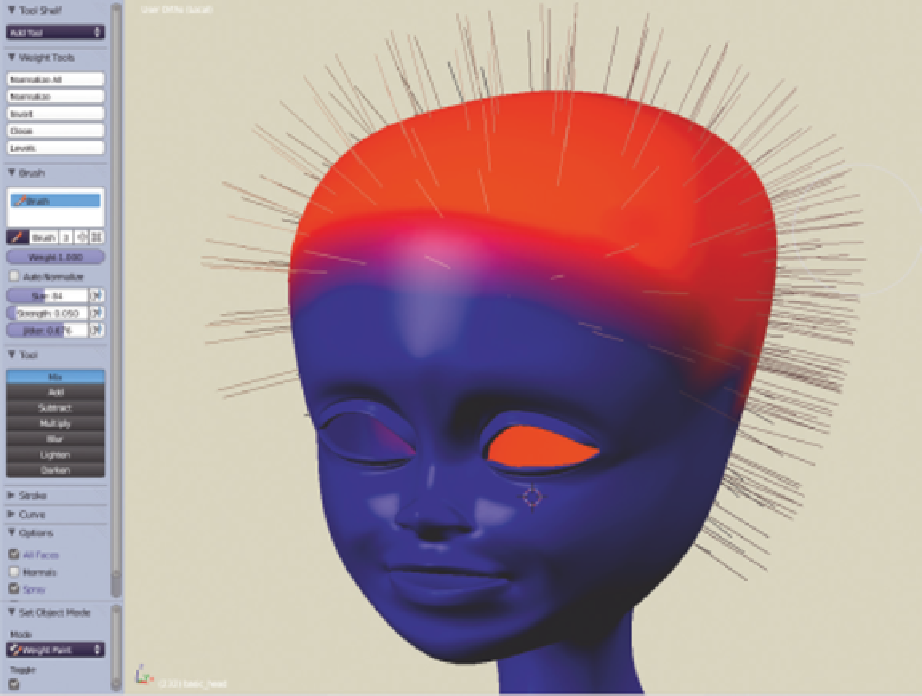
Figure 6.36
Ready to paint.
like hairlines to be, you can always go into Edit mode and add an edge loop or two to provide the extra
geometry that you need. If painting seems sluggish on your system, try disabling the Subsurf modifier on
the head. It can really slow down the paint tools.
Hair Styling and Digital Rogaine
Let's take a look at another 3D view mode that uses the same brush-type interface as Weight Painting.
On the 3D view header, switch from Weight Painting mode to
Particle
mode, which uses a little comb
as its icon. The tool shelf changes to the particle tools, as shown in
Figure 6.37
. It's time to think of
yourself as a digital hair stylist. All of the provided styling tools work with the same Size and Strength
controls as painting, and function by LMB dragging on the hair in the 3D view.
●
Comb:
This pulls the hair around. By keeping
Root
and
Length
enabled in the Options section, it
works as you would expect. Disabling Root causes the tools to move the entire hair, including where
is it “anchored” to the mesh. Disabling Length causes the comb tool to stretch the hair.
Search WWH ::

Custom Search